More of the components needed for Vizeran’s demon summoning ritual can be found in the depths of the Labyrinth-a snarl of twisting tunnels and caves extending approximately 240 miles from north to south and 120 miles east to west. Navigating the Labyrinth is a nightmare, since most tunnels follow a straight path only a short distance before doubling back on themselves or ending abruptly.
Baphomet the Horned King appeared in the Labyrinth when the demon lords were summoned to the Underdark. At the same time, Baphomet’s rival Yeenoghu, Demon Lord of Gnolls, has taken to hunting the twisting passages of Baphomet’s new domain.
Vizeran tells the characters to find the Gallery of Angels, a location in the heart of the Labyrinth lies some three hundred miles from Araj. It is the one place where Vizeran knows the characters can find the angel feathers required for his ritual’s talisman. The Maze Engine lies forty-eight miles deeper into the Labyrinth if the characters choose to follow up on clues leading there (see the “March to Nowhere” and “Maze Engine” sections for details). The adventurers will also find a few unexpected opportunities to aid in the fight against the demon lords along the way.
Long ago, the Labyrinth was much like any other part of the Underdark, consisting largely of natural caverns connected by tunnels and underground rivers. The discovery of precious metals and gemstones led dwarves and others to excavate, extending its tunnels and expanding its caves. The results of those efforts saw an insignificant corner of the Underdark transformed into a vast, sprawling network of passages.
Abandoned settlements within the Labyrinth are common, marked out by rusting iron rails and scattered ore carts. Dark mine shafts descend into the unknown depths, while tunnels stretch off in random directions. Rifts both small and large also appear throughout. Many a tunnel ends abruptly at a rift, as if the way ahead was simply sheared off to leave a vast, yawning chasm. Some of these rifts run to depths of a few hundred feet. Others ascend and descend for miles. Many of the rifts show their age by the presence of carved switchback staircases along their walls, or weathered bridges spanning their gaps.
Characters in the Labyrinth can easily become lost. Traveling through this area follows the rules under “Navigating” in chapter 2, but it takes a successful DC 12 Wisdom (Survival) check to avoid becoming lost, rather than a DC 10 check. Spellcasters must contend with the effects of the faerzress for as long as they are in the Labyrinth, also as discussed in chapter 2.
Labyrinth Encounters
This chapter features a number of set encounters. Either as the characters journey to the Labyrinth or return to Vizeran’s tower, you can run the “Adamantine Tower” encounter. Once the characters reach the edge of the Labyrinth, go to the “Spiral of the Horned Lord” encounter.
Within the Labyrinth, the characters take on the encounters “Filthriddens,” “March to Nowhere,” “Yeenoghu’s Hunt,” and “Gallery of Angels” (their intended destination). They might also take on “The Maze Engine” encounter, inspired by knowledge gained in chapter 13 and an encounter with some modrons in the Labyrinth.
Random Encounters
Twice each day that the party spends in the Labyrinth (whether traveling or resting), roll a d20 and consult the Labyrinth Encounters table to determine what, if anything, they encounter. This table replaces the random encounter tables in chapter 2 for as long as the party remains in the Labyrinth.
Labyrinth Encounters
| d20 | Encounter |
|---|---|
| 1-10 | No encounter |
| 11 | 1 behir |
| 12 | 2d4 flumphs |
| 13 | Gnoll pack |
| 14 | 1d4 grells |
| 15 | 1d4 hezrous |
| 16 | 4d8 manes |
| 17 | 2d4 minotaurs |
| 18 | 1 monodrone |
| 19 | 2d6 quaggoths |
| 20 | 1d4 shriekers |
Random Encounter Locations
Random encounters in the Labyrinth take place in one of the following environments, modified as you wish to suit the creatures in the encounter.
Caves. Most caves in the Labyrinth are small (up to 30 feet in diameter), with uneven floors featuring stalagmites, columns, or pools of standing water. A cave has a 10 percent chance of featuring luminescent growth on the walls that fill it with dim light. In addition to the tunnel through which the characters enter, there are 1d3 additional tunnels leading out. These tunnels can exit the cave through the floor, ceiling, or at odd angles.
Tunnels. Most tunnels in the Labyrinth are 5 to 10 feet wide, with ceilings 1d8+3 feet high. A tunnel follows a straight path for no more than 2d4 × 10 feet before it turns.
Rifts. The Labyrinth is shot through with rifts and chasms formed by upheavals in the earth. Blocks of stone thrust up in some places to hinder movement through passages and caverns, while other areas drop off suddenly, forming escarpments hundreds of feet high. In some places, the earth has shifted horizontally, creating tunnels that end suddenly only to continue hundreds of feet away.
Any rift the characters encounter has a 75 percent chance of featuring a bridge or staircase constructed to navigate it.
Behir
This long-bodied reptile is either prowling a tunnel or resting in a cave when the characters encounter it. The behir retreats if reduced to 80 or fewer hit points.
Flumphs
This cloister of flumphs feeds on the psychic energy they detect from a nearby mind flayer that has enslaved 2d4 quaggoths. The flumphs warn adventurers who communicate with them about the nearby threats, but it is up to the characters whether they wish to engage those threats.
Gnoll Pack
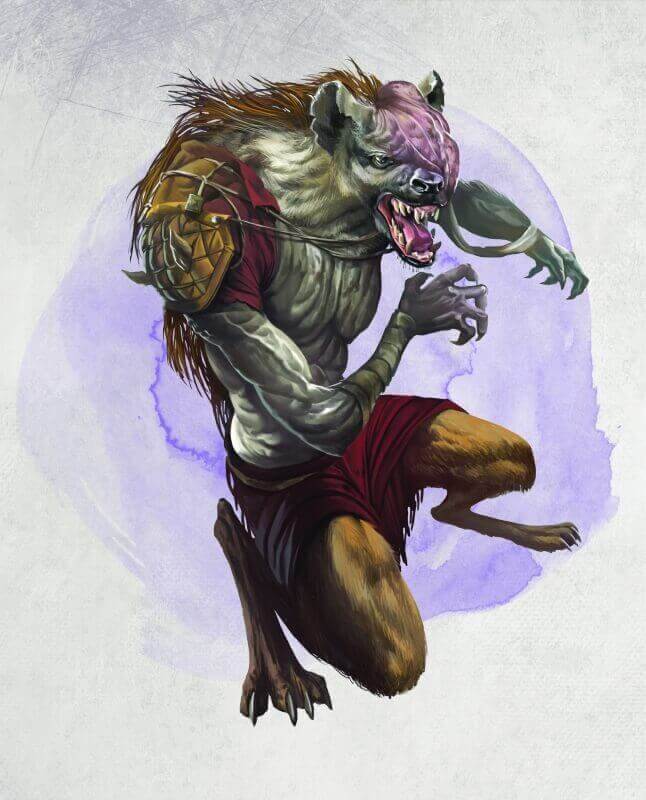
A gnoll fang of Yeenoghu named Kurr made his way into the Labyrinth shortly after Yeenoghu was summoned to the Underdark. Kurr brought with him a pack of hyenas and had them feast on the corpses of his slain victims. This heinous act transformed the hyenas into ten gnolls. Kurr’s pack now prowls the Labyrinth in search of Yeenoghu, slaughtering anything and anyone they happen upon.
Unknown to his gnoll progeny, Kurr has succumbed to a form of madness that quells his feral demeanor. He’s lost his appetite for carnage and is overcome with guilt for all of the creatures he has slain. When his pack happens upon the party, he sends his gnolls into battle but doesn’t partake of the violence, hoping that the characters slaughter his brethren. Once they are dead, Kurr bows his head solemnly, begs Yeenoghu’s forgiveness (first in his own language and then in Abyssal), and then throws himself at the party’s mercy.
Kurr is suffering from a form of indefinite madness (see “Madness” in chapter 8 of the Dungeon Master’s Guide) which, if cured, reverts him to a typically feral gnoll. While afflicted with madness, Kurr can’t bring himself to kill any living creature except in self-defense. If the characters spare his life, Kurr can act as a guide, for he has explored a great deal of the Labyrinth and can lead the characters along a safe route to an Underdark shanty town (see “Filthriddens”). Characters have no random encounters if they follow Kurr along this route, although they periodically stumble upon the corpses and bones of Underdark creatures slain by his gnolls.
The encounter with Kurr’s pack occurs only once. Any subsequent occurrence of this encounter is with a pack of 3d6 gnolls. These gnolls came to the Underdark with Yeenoghu. They cackle and scream the demon lord’s name as they tear into their prey.
Grells
The grells drop from an overhead shaft to feed.
Hezrous
These demons are tearing apart an iron ore cart, a rusted section of mining track, or some other old fixture. Party members can attempt to slip past the demons without arousing their attention. Doing so requires a successful DC 11 Dexterity (Stealth) check. On a failed check, the demons detect the party member and attack.
Manes
Characters can hear the mewling of this vile mob long before it appears. The manes scour the Labyrinth for easy prey and move like a tide of putrid flesh.
Minotaurs
These minotaurs roams the Labyrinth, slaying creatures in the name of Baphomet.
Monodrone
This modron has become separated from its fellows (see “March to Nowhere”), and there is a 75 percent chance that it is looking to rejoin them. If the characters can understand its language, the monodrone repeatedly says, “We are on the march!”
A monodrone that doesn’t want to rejoin its fellows is a rogue modron, made so by the chaotic energies suffusing the Underdark. This rogue monodrone gladly joins the party, saying “Down with Primus!” in its own language over and over. Its alignment is chaotic neutral, and it can only follow one simple task at a time.
Quaggoths
These quaggoths are hungry and attack the party regardless of its size. If there are five or more quaggoths in the group, one of them is a quaggoth thonot (see the “Variant: Quaggoth Thonot” sidebar in the “Quaggoth” entry of the Monster Manual). If the thonot dies, the other quaggoths immediately break off their attack and begin feasting on the thonot’s remains, hoping to gain its psionic power.
Shriekers
The shriekers sound off when bright light or a creature is within 30 feet of them. Their shrieking has a 75 percent chance of attracting other monsters, in which case roll again on the Labyrinth Encounters table, treating another shrieker encounter as “no encounter.”
Adamantine Tower
The adventurers come across a tower haunted by forces of darkness.
Vaulted chambers bristle with stalactites and stalagmites, slowing your passage as you wend your way across uneven floors. Moving through a narrow passage, you enter a cavern dimly lit by phosphorescent fungi-and are met by the sight of a dark metal tower perched on the edge of a cliff that drops away into darkness.
The square tower is twenty feet on a side and thirty feet high, with arrow slits in each wall. A battlement crowns its top, with a stone gargoyle peering over each side. Set into the middle of the wall facing you is a sturdy-looking door made of the same dark metal as the rest of the tower.
No ordinary structure, the tower is a
A character can learn the tower’s command words by casting an identify spell on it. The command word to open the front door or the trap door on the roof is “mimsy.” The command word to transform the tower into a one-inch metal cube is “brillig,” but speaking it has no effect since the shadow demons are still inside. To return the tower to its cube form, the adventurers must first empty it of any creatures.
Four gargoyle perch atop the tower. They remain motionless as the characters enter the cavern, attacking only if anyone attempts to enter, climb, or damage the tower.
This cavern’s rough floor has been flattened where the tower stands, while the floor behind the tower has collapsed into a shaft 300 feet deep and 100 feet in diameter. Several tunnels branch off from the roughwalled shaft at various points, allowing the characters to continue their journey after climbing down. They can move around the tower easily if they wish to ignore it.
First Floor
The first floor of the tower is an open room. A ladder affixed to the back wall leads up through a trapdoor to the floor above. A pile of bones and moldering clothes lies in the corner - the remains of the tower’s former owner.
Treasure
Searching through the remains turns up two empty potion bottles and a potion of mind reading.
Second Floor
This empty chamber has a ladder affixed to one wall that climbs to an adamantine trap door leading to the roof. The trap door is closed and locked, though the proper command word (“mimsy”) can open it.
The two shadow demon lurk in the darkness of this room and attack the first character who enters, likely taking their prey by surprise.
Battlements
The top of the tower features an open space surrounded by a crenelated wall. If the four gargoyle have not yet attacked the adventurers, they do so here.
Spiral of the Horned King
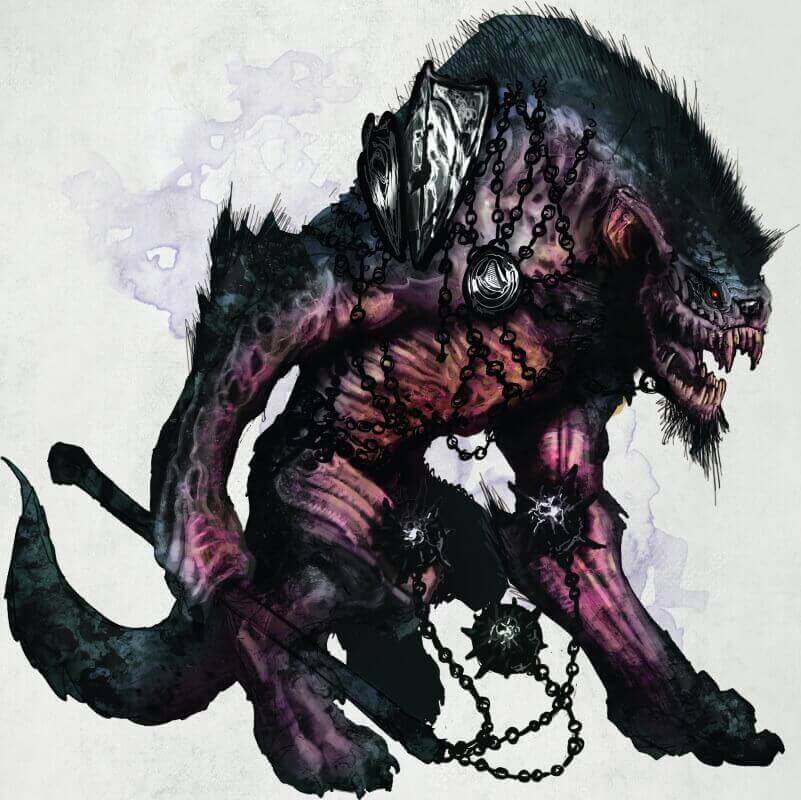
Minotaurs have roamed the tunnels of the Labyrinth for ages, but as Baphomet’s influence grows, so too has the ferocity of his chosen servants. The waxing of Baphomet’s power has not gone unnoticed by the packs of gnolls rampaging through the Underdark. The gnolls have begun making inroads into minotaur territory. The latest battlefield in the ancient feud between Baphomet and Yeenoghu is a maze of passages that grant access to the deeper passages of the Labyrinth.
The tunnel you have been following gradually widens until it opens into a cave with a high ceiling overhead. Patches of glowing fungi cling to the walls and fill the chamber with dim light. Columns of stone support the ceiling, the rock marbled with veins of glittering crystal. Across the chamber, a great cleft is ringed by a profusion of sigils and glyphs. Stacked to either side of the opening are two mounds of severed heads.
The cleft leads to the Spiral of the Horned King-a maze of tunnels and caves along the outer edge of the Labyrinth. Though other routes can be found into the Labyrinth, this entrance is the easiest to find.
Invocations to Baphomet, dire curses, and the inverted names of the gods are scrawled around the cleft in dried blood, and continue on down the tunnel walls. Anyone who can read the Abyssal tongue can tell that this place has been consecrated in the name of Baphomet, the Horned King and lord of minotaurs.
The minotaurs tear off their victims' heads, then leave them to “watch” the entrance for intruders. Most of the heads are from gnolls, though different Underdark races can be found if any character wants to sift through the piles.
Gash the Gnoll
Minutes after the characters arrive, they hear the sounds of footsteps approaching. A few moments later, a gnoll slinks from the tunnel ahead.
A gnoll creeps out of the shadows, glancing cautiously at the piles of heads to either side of it. Its filthy body is bent and covered with tatters of clothing and scraps of blood-crusted armor. The creature looks you over with one good eye, the other lost in a mass of scar tissue.
This wretched gnoll is named Gash. Thanks to treachery he committed against his kind, the minotaurs spared his life. However, their mercy comes with regular abuse and torment. The gnoll now sees himself as a loyal and willing servant of the brutes, and he is eager to lead gnolls and anyone else to his minotaur masters.
Gash is a gnoll with the following modifications:
- Gash has 11 hit points.
- He has a walking speed of 25 feet.
- He has disadvantage on Wisdom checks and Wisdom saving throws because of the physical and mental abuse he has suffered. A lesser restoration spell rids him of these effects.
Cringing and mewling, Gash approaches the party with arms out and head down. He speaks in both Gnoll and Abyssal. If the characters can’t understand him, he pantomimes helpful gestures and beckons them to follow him.
“Powerful masters,” the gnoll whines. “You honor us by your presence. Seek you passage through the maze? The Spiral of the Great Horned King? I can help. Yes. Trust Gash and he will see you through the maze, he will.”
Any aggressive action sends Gash skittering back into the maze and to his masters. If the characters capture him, he shrieks and screams, drawing one minotaur to investigate the racket.
Accepting Gash’s offer transforms the cringing gnoll into a dutiful guide. He leads the characters through passage after passage, choosing directions seemingly at random until the characters encounter the minotaurs. If the battle turns against the minotaurs, Gash flees.
If the adventurers show pity or kindness, Gash becomes confused, as he has never experienced such things. A character can befriend the gnoll with a successful DC 20 Charisma (Persuasion) check. If any character uses magical healing on Gash, the check is automatically successful.
If the characters befriend Gash, he warns them to turn back, flee, and never return. He says his masters are vile minotaurs who wait in the maze, eager to kill all trespassers. If asked, Gash explains that the minotaurs spared his life in exchange for leading travelers into the maze. If the characters insist on entering the maze, Gash goes with them, trying to keep his new friends safe. If the characters defeat the minotaurs and move deeper into the Labyrinth, Gash can accompany them as a follower and guide, giving the characters advantage on Wisdom (Survival) checks to avoid becoming lost in the Labyrinth.
Into the Maze
The minotaurs' maze fills a region of the Underdark one mile on each side. A network of corridors climbing up to higher levels and descending to lower ones by way of ramps, the maze requires time, attention, and patience to navigate. The corridors are 10 feet wide and tall, faced with stone blocks mortared into place. Bits of flesh and bone litter the floor, and splashes of blood cover the walls.
When the characters enter the maze, have them choose their pace (fast, normal, or slow). It takes 1 hour to navigate the maze at a fast pace, 2 hours at a normal pace, or 3 hours at a slow pace. Halfway through the journey, the navigator must make a DC 15 Wisdom (Survival) check. A fast pace imposes a -5 penalty to the check. A slow pace grants a +5 bonus. On a success, the characters find their way out. On a failure, the characters must start the journey from the beginning.
The longer it takes the characters to navigate through the maze, the greater the risk of encountering the creatures within it. Every 30 minutes the party spends in the maze, roll a d20 and consult the Maze Encounters table to see what, if anything, the characters meet.
If Gash was attacked by the characters and fled into the maze, he does his best to bring threats down on them, in which case roll two d20s and take the higher result. If Gash is friendly to the party and accompanying them, he tries to steer them away from danger, in which case roll two d20s and take the lower result.
Maze Encounters
| d20 | Encounter |
|---|---|
| 1-10 | No encounter |
| 11-12 | Corpse |
| 13-14 | Gnawed bones |
| 15-17 | 2d4 gnolls |
| 18-20 | 1d6 minotaurs |
Corpse
The characters stumble upon the headless remains of a butchered corpse belonging to a dead dwarf, gnoll, human, or svirfneblin.
Gnawed Bones
A pile of cracked and gnawed bones is laid out around a pool of dried blood.
Gnoll Pack
A frenzied group of 2d4 gnolls is lost in the maze. The gnolls attack any creatures they see.
Minotaurs
These bloodthirsty minotaurs are hunting gnolls but attack any other creatures they happen upon.
Treasure. The first time the characters fight the minotaurs, one of them carries 32 ep and 22 cp in a pouch made from a human face with the eyes and mouth sewn shut. The second time the characters encounter minotaurs, one of them wears silver caps (worth 25 gp each) on the ends of its horns.
Filthriddens
Filthriddens was, until recently, a shanty town of Underdark exiles and refugees. The greatest threat to inhabitants-apart from food shortages-was the minotaurs that raided the settlement from time to time, dragging off screaming prisoners to meet a grisly fate. The recent arrival of the demon lords changed things. A group of minotaurs was on its way to raid Filthriddens when Yeenoghu and a pack of his frenzied followers tore through this part of the Labyrinth, catching the minotaurs off guard and slaughtering them. The sole witness to this carnage was Grisha, an escaped human slave of the drow. Yeenoghu’s intercession saved him from the minotaurs.
Yeenoghu and his pack moved on, but Grisha took the head of a slain minotaur and brought it back to Filthriddens. The skull became a talisman as Grisha named Yeenoghu as the new protector and patron of Filthriddens. Residents who opposed this dark worship were exiled or executed in short order. The cult of Yeenoghu now controls the settlement, and Grisha rules with an iron fist. He senses the power of Yeenoghu in all things-and particularly in the way in which cultists have begun to rise as undead ghouls after death.
Grisha’s Greeting
Filthriddens lies 48 miles from the Spiral of the Horned King, deeper in the Labyrinth. Kurr (see “Random Encounters”) or Gash (see “Gash the Gnoll”) might lead the characters here if they don’t find it on their own.
The cavern that opens up ahead looks like a settlement, with tents and crudely built shanties lining its irregular walls. It appears deserted except for a lone human male kneeling within a circle of burning torchstalk mushrooms in the center of the cave and two ragged figures lurking near a zurkhwood door set into a wall thirty feet distant. The figure in the circle is praying over a rotting minotaur head but stands when he sees you. He’s a thin human, and his face and arms are streaked with dry blood.
“Friends,” he says, “I have heard the call and I hope you have too. With my own eyes, I saw our Great Lord Yeenoghu slaughter the minotaurs that had plagued us. Now we are free and strong with his blessings. We feast while we live, and thanks to our lord, we will also feast when we are dead. If you’ve heard the call, come. Join my pack and feel the strength of Yeenoghu.”
The figure smiles as he speaks, revealing teeth filed to sharp points.
Filthriddens is contained within a cave roughly 100 feet long and 60 feet wide. The characters enter from a natural tunnel along one of the shorter walls, with another tunnel exiting on the opposite side. Much of the cave is taken up with crude shanties. Most of them stand empty, their inhabitants either exiled or dead.
Grisha can recount the history of Filthriddens and how Yeenoghu saved its denizens from the oppression of the minotaurs. He can also reveal how he spent years as a slave of the drow. Grisha seeks new disciples to grow his cult’s power.
Twelve cultist (a mix of shield dwarves, halflings, and humans) support Grisha if a fight breaks out. Ten of them are hidden in the shanties. Two more stand next to a zurkhwood door, beyond which lies a small side cave where cultists who have died and risen as undead are kept. If battle erupts, the cultists open the door and release six ghoul. The ghouls ignore the cultists as long as there are other creatures to feed on.
March to Nowhere
The Labyrinth is aptly named, for even the most resolute of explorers can become lost in its depths, as a number of modrons discovered to their dismay. Separated long ago from their fellows during the Great Modron March, these modrons have been wandering the Underdark for a long time.
As the party travels deeper into the Labyrinth, any character with a passive Wisdom (Perception) score of 15 or higher hears the sounds of marching feet off in the distance. To investigate the source of the noise, the characters must travel for 15 minutes through cramped tunnels requiring as much climbing as crawling. At the end of this time, the adventurers emerge onto a shelf 15 feet up the wall of a broad, straight tunnel some 20 feet high.
A curious procession of creatures marches along the tunnel below your position. Twelve of the creatures are identical. Each has a round body, spindly arms and legs, a pair of fluttering wings rising above its arms, and a single eye staring out over a wide, smiling mouth. At the column’s head stands a creature that looks like an inverted pyramid held up by six legs. It scuttles like a crab. On each side of its body, an eye is set above a mouth. Under the mouth, a single arm grips a spear in its hand.
Twelve monodrone and a tridrone have been wandering the Labyrinth since the last Great Modron March. The modrons became separated from their fellows and trapped here. Unable to find their way back to Mechanus, the modrons have been pressing on (and on), knowing that they must find their way back or be destroyed in the process.
The extended march has taxed the modrons to their limit. Most show signs of the frustration of being unable to fulfill their mission. The tridrone has managed to keep the group together, but it feels responsible for their collective fate and their failure to return home. Even if the characters have the ability to communicate with the modrons, the monodrones' ability to communicate is all but spent (see the “Roleplaying the Modrons” sidebar).
The tridrone can be very communicative-provided the characters have a way to speak with it and can allay its suspicions. A character can persuade the tridrone of the party’s good intentions with a successful DC 15 Charisma (Persuasion) check. They have advantage on the check if the party includes one or more modrons.
Once convinced of the characters' friendly intentions, the tridrone tells them that it and its fellows are on a mission of supreme importance, though it doesn’t reveal the nature of that mission. A character can puzzle out the reason why the modrons might be here by making a DC 20 Intelligence (Arcana) check. Success indicates that the character recalls stories about the Great Modron March, which occurs every 289 years and sees a vast army of modrons marching across the Outer Planes. If the check succeeds by 5 or more, the character also knows the last march happened over two hundred years ago, and that these modrons are likely remnants of that march. The tridrone doesn’t admit this (not wanting to acknowledge its failure), though it might be convinced to follow the characters if they offer to lead the modrons out of the Labyrinth. Additionally, the tridrone knows the Labyrinth well, and befriending the modrons grants characters a +5 bonus to Wisdom (Survival) checks made to navigate the region.
The tridrone warns the characters to avoid the center of the Labyrinth, explaining that a malfunctioning “Orderer” is there. The characters might know the device by its other name: the Maze Engine. Because the device was built on Mechanus, its magical energy resonates with the modrons. The tridrone explains that an Orderer is designed to bring order to chaos by altering reality. A malfunctioning Orderer can be very dangerous, however, altering reality in unexpected ways. The tridrone knows exactly how far it is from the device. Because its knowledge of magic is limited and its focus on rejoining the Great Modron March is all-consuming, the tridrone has never thought about whether the Orderer might provide a solution to the modrons' predicament. If the characters express an interest in investigating this possibility, the tridrone leads the party to the center of the Labyrinth where the Maze Engine is found.
Roleplaying the Modrons
Modrons have no sense of individuality. They are a collective and refer to themselves as “we” or “us.” As a result, modrons don’t understand individuality in others. When speaking to a group, the tridrone might focus its attention on the adventurer it believes to be at the top of the party’s hierarchy even while talking to another.
Monodrones can normally relay messages up to fortyeight words long. However, years of wandering have degraded these creatures so that they can speak only a few words or phrases before sputtering off into clicking and popping noises. Among the words the monodrones repeat are “march,” “Mechanus,” “seventeen” (the number of cycles of the plane of Mechanus that mark the Great Modron March), and “lost.”
Yeenoghu’s Hunt
About twelve miles from their encounter with the modrons, as they travel through the Labyrinth, the characters hear sounds of howling in the distance off and on over the course of many hours. Sometimes the sounds get closer or fade away, echoing strangely through the surrounding tunnels.
Eventually, the characters enter a smaller tunnel leading upward. As they move forward, they can clearly hear the sound of fighting ahead. Bestial howls and yips can be heard, along with deeper roaring. A successful DC 13 Intelligence check recognizes the language of the battle cries as Gnoll. The characters can retreat away from the sounds of combat, but doing so means backtracking for six miles to find another route. If they continue ahead, they are confronted with a grisly scene. Though the characters likely have no firsthand experience of a goristro, they recognize the creature from the information provided to them by Vizeran DeVir.
As you move forward, the sounds of furious battle grow louder. The tunnel ends at a ledge twenty feet above the floor of a large cavern, giving you a perfect view of the conflict below.
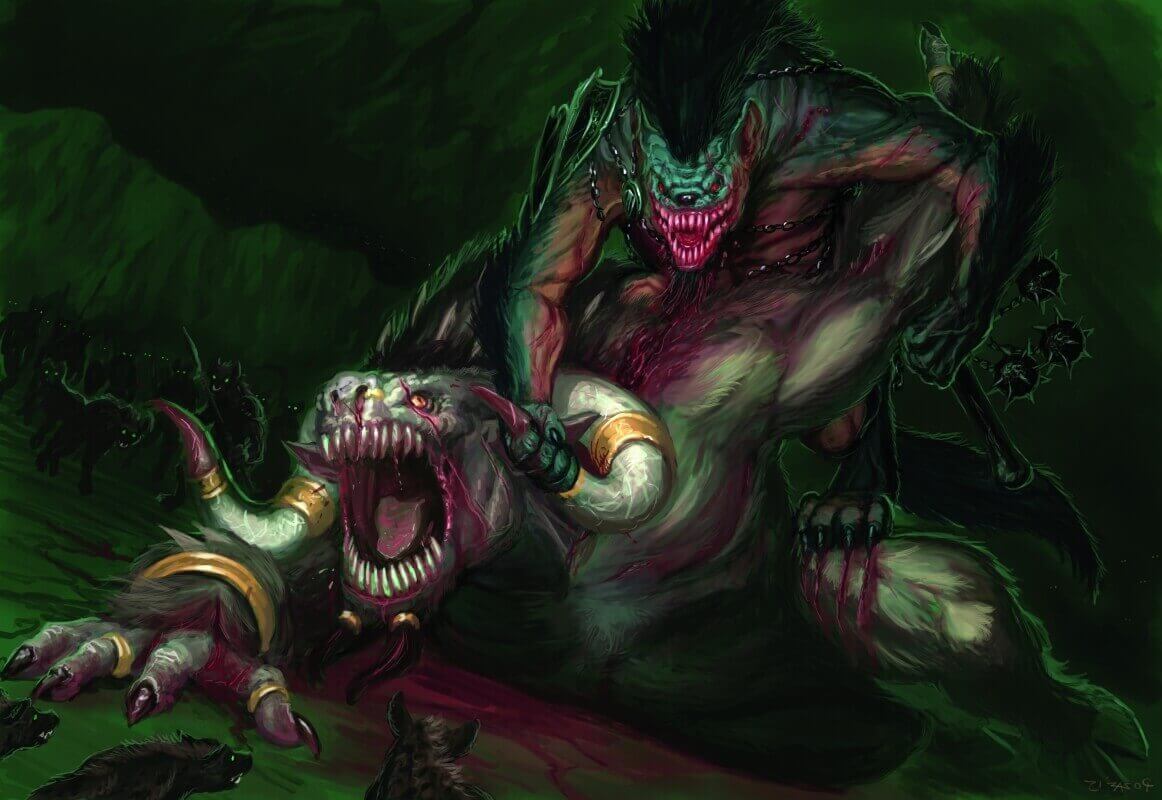
On the shores of an underground lake, a pack of frenzied gnolls and hyenas surrounds a demon standing nearly twenty feet tall, with massive arms, clawed hands, cloven hooves, and the head of a bull. This is a goristro, whose heart Vizeran DeVir has instructed you to claim.
Leading the gnolls is a figure of fearful countenance, twelve feet tall with the head of a snarling, amber-eyed hyena. He wields a massive triple flail, whose whirling heads smash into the larger goristro. The gnolls howl their master’s name as he strikes swiftly, again and again: “Yeenoghu! Yeenoghu!”
The larger demon roars, slashing with its bull’s horns and flailing with its claws, but to no avail. Yeenoghu evades or shrugs off its attacks, even as gnoll archers pepper it with arrows. Then the gnolls swarm the goristro as it begins to falter, bringing it crashing to the ground.
In less than a minute, the battle is won. The demon lord Yeenoghu pulls back the goristro’s head by the horns and rips out its throat with his teeth. He throws back his head and his howl of triumph echoes through the chamber, shaking the stones themselves. Several hyenas nipping at Yeenoghu’s heels leap onto the goristro’s corpse and begin feasting on its flesh. As you watch, these hyenas transform into gnolls.
Any adventurer witnessing this horrible tableau must succeed on a DC 12 Wisdom saving throw or gain one level of madness (see “Madness” in chapter 2). If this causes the character to suffer a bout of indefinite madness, determine the nature of the madness using the Indefinite Madness of Yeenoghu table in appendix D.
Yeenoghu has been wandering the Underdark since he was first summoned, and the adventurers have run across him and his pack. The characters' only advantage at this moment is that they haven’t yet been detected. Considering their level at this stage of the adventure, the players might be creating new characters quite soon if they dare confront the demon lord.
If the characters stay hidden and observe, Yeenoghu leaves in short order. He is restless and eager for new prey. Yeenoghu gathers up most of the gnolls and hyenas and leads them down a tunnel on the right side of the cavern. Eight gnoll led by a gnoll pack lord remain in the cavern, feasting on the goristro ’s corpse.
If the characters want to continue forward, the gnolls and hyenas need to be dealt with. Alternatively, if the characters are indecisive or spend too long debating the best course of action, the gnoll pack lord sniffs out the intruders. When it realizes that enemies are present, the pack lord howls to draw the attention of its followers.
Development
Another tunnel on the opposite side of the cavern heads off in a different direction than where Yeenoghu led his pack. Characters who defeat the remaining gnolls can continue on their way without losing any more time.
The close brush with Yeenoghu pays dividends to the adventurers by delivering two components of Vizeran’s ritual into their hands. The first is the heart of the goristro, which the characters can remove from its corpse. The massive heart is the size of a small trunk and weighs nearly one hundred pounds. Any characters close to it while it is being transported imagine that they can occasionally hear it beating. A character who carries the heart, even in a bag of holding or similar extradimensional space, makes saving throws against madness with disadvantage.
The second component takes the form of a few spatters of a demon lord’s blood. A successful DC 10 Wisdom (Perception) check finds some of Yeenoghu’s black blood on the fallen goristro’s horns.
Hunted by Yeenoghu
If you’d like Yeenoghu to play more of a role in this chapter of the adventure, it’s easy to do so. When the gnolls killed by the characters do not rejoin the hunt, the demon lord circles back to the site of the goristro’s demise and discovers his slain minions - and also picks up the scent of the adventurers.
Later in the adventure, Yeenoghu hunts down the characters to make them pay for their impudence (ideally when they are much higher in level). Before the final confrontation, give the characters hints that they have become the demon lord’s prey. They might face an increasing number of gnoll ambushes, for example. One or more of their attackers might refer to them as “prey of Yeenoghu,” or otherwise taunt them by speaking of their impending doom.
The characters should have time to prepare for the fight they know is coming, and to think about tactics other than facing Yeenoghu in straight-up combat. For example, becoming the demon lord’s quarry might work to their advantage later in the campaign, making them the perfect bait to lure Yeenoghu into a trap in chapter 17, “Against the Demon Lords.”
Gallery of Angels

This cavern lies deep inside the Labyrinth and contains another ritual component that Vizeran needs.
The passage you follow climbs upward as it corkscrews through stone, finally emerging through the floor of a large cavern. The ceiling arches sixty feet overhead, bristling with stalactites that drip water onto stalagmites rising from the uneven and broken floor. Here and there between the stalagmites, several statues of winged humanoids are set in poses of suffering and anguish. Some cover their faces, while others claw at them. Others reach toward the ceiling, their faces twisted into expressions of longing.
This chamber houses the petrified remains of eight fallen angels, condemned by the gods to pass the ages in the dark depths. Each appears to have been carved from stone in some position of fear, suffering, hatred, or longing. Each statue is spotted with lichen and marred by mineral deposits, which have crystallized out of the water dripping from the ceiling over uncounted years.
Even though they are transformed into stone statues, the fallen angels remain very much alive, their petrified bodies having become prisons for their minds and souls. They remember who they were. They know what they did and why they are here. They know everything transpiring around them. Yet they can do nothing. They are trapped forever, and the isolation, darkness, and endless torment of their fate have driven them mad. No spell can undo the angels' curse or free them from their petrified state.
Fallen Angels
The angels can communicate, albeit in a limited fashion, with living creatures that touch them.
A character who makes physical contact with an angel (even through gloves or some other protective covering) knows that angel’s name and experiences the effect described below. If you wish, you can roll a d8 to determine which angel a character touches, rerolling any repeat results. Unless specified otherwise, the effect is instantaneous. While there’s no limit to the number of creatures that can touch an angel and be affected by it, a creature that touches an angel and triggers its effect can’t trigger that particular angel’s effect again until 24 hours have elapsed.
Anaya
This angel reaches toward the ceiling, its face a mask of hatred. A creature that makes contact with this angel must make a DC 15 Wisdom saving throw, taking 3d6 psychic damage on a failed save or half as much damage on a successful one.
Baatral
This angel appears to be reaching out as if offering something. A character making contact with the angel must succeed on a DC 15 Charisma saving throw or become charmed for 1 minute.
While the character is charmed, the angel has a telepathic link with the character as long as it and the character remain on the same plane of existence. The angel issues commands to the character, and the character does its best to obey those commands if it is conscious. The angel typically commands a character to kill, maim, rob, or otherwise harm its companions.
Each time an affected character takes damage, he or she makes a new Charisma saving throw against the effect. If the saving throw succeeds, the effect on it ends.
Harajin
This angel points at a spot on the cavern wall, and its mouth hangs open in horror. A character who makes contact with the angel hears horrific screaming and must succeed on a DC 15 Wisdom saving throw or gain one level of madness (see “Madness” in chapter 2).
Lorabelios
This angel stands feet apart, head downcast, arms at its sides. A character making contact with the angel hears a soft voice say in Common, “Do not lose hope.” The character’s next Wisdom saving throw is made with advantage.
Nemevon
This angel holds its hands to its face, concealing its visage. Upon making contact with this angel, the character hears a soft voice repeating two words over and over in the Celestial language: “Kill me.” There is no obvious way for the characters to do so, however. The voice persists even if the angel is shattered.
Silnia
This angel covers its eyes with its arm but appears to be smiling. A character who touches the angel must make a DC 15 Wisdom saving throw. On a failed save, terrifying nightmares haunt the character’s sleep during his or her next long rest. The character derives no benefits from that rest and, upon waking, takes 3d6 psychic damage.
Tamiel
This angel kneels on the floor and buries its face in its arms. A character making contact with the angel hears a soft voice say in Common, “What would you know? Ask and I shall answer.” The character must make a DC 15 Intelligence saving throw. On a failed save, the character takes 3d6 psychic damage and gains one level of madness. On a success, the character can ask two questions. The angel replies as if the character had successfully cast the contact other plane spell.
Zarod
This angel claws at its eyes, and its face appears torn and rent. When a character makes contact with the angel, it invites the character to ask a single question concerning a specific goal, event, or activity to occur within seven days. The angel replies as if the character had successfully cast the divination spell.
Development
The adventurers can chisel or break off stone feathers from the angels' wings. One each from six different angels fulfills the requirements for Vizeran’s ritual, although characters can take more feathers if they want.
Other creatures in the Labyrinth avoid this cavern, making it a safe place for the party to take a long rest.
The Maze Engine
Deep within the Labyrinth lies the Maze Engine-a mechanical, magically powered device capable of altering reality. Modrons refer to the device as an Orderer because it was designed is to bring order to chaos. If the characters activate the Maze Engine, it has the potential to aid their fight against the demon lords.
The engine looks like a working model of the Great Wheel (see chapter 2, “Creating a Multiverse,” in the Dungeon Master’s Guide). It’s a 20-foot-diameter sphere built of 1-foot-wide bands of magically hardened and shaped bronze, engraved with arcane symbols. Gaps in the bands show various gears and articulation arms within the sphere, which rotate and shift to represent the relationships between the various known planes of existence.
Characters might learn about the existence of the Maze Engine from the beholder Karazikar (see chapter 13) or from Vizeran, who has heard rumors about an ancient reality-altering device. Characters might also learn about the engine from Karazikar’s modron prisoner or from the modrons lost in the Labyrinth (see “March to Nowhere”).
Information about the Maze Engine can also be found in Gravenhollow (see chapter 11). The characters could experience a vision of a journey to the Labyrinth in the library, or read an account of the device in its archives.
Reaching the Engine
Located forty-eight miles southeast of the Gallery of Angels, the Maze Engine is wedged halfway down a 20-foot-wide, 100-foot-deep crevasse located in the middle of a large cavern. The bottom of the crevasse is filled with magma. A shimmering curtain of heat rises from the crevasse and makes the cavern hot and dry.
The roughly spherical engine is 40 feet below the top of the crevasse and 40 feet above the magma. It can be reached by magic or by climbing down to it. The sheer sides of the crevasse require a successful DC 12 Strength (Athletics) check to climb. On a failed check, a character makes no progress and dislodges loose stones that clatter down the crevasse into the magma. If the check fails by 5 or more, the climber falls into the magma. Any creature that enters the magma or starts its turn there takes 42 (12d6) fire damage. Every foot moved in the magma costs 5 feet of movement.
Slaughtertusk
Having just recently found the Maze Engine, Baphomet has set a nalfeshnee named Slaughtertusk to watch over the crevasse and prevent any creature from approaching the device. Slaughtertusk would rather be helping the Horned King track down and kill Yeenoghu. The nalfeshnee is bored with its assigned task, although it knows better than to disobey the Horned King. Still, rather than immediately destroying any intruders, it toys with them for as long as possible.
Slaughtertusk is happy to let a fight drag on, feasting on its enemies' pain before finally slaying them. If reduced to fewer than 100 hit points, it uses its Summon Demon feature (see the “Variant: Demon Summoning” sidebar in the “Demons” entry of the Monster Manual) and tries to summon 1d6 vrocks. It has a 50 percent chance of succeeding.
Slaughtertusk is a bully at heart and begs for its life if the adventurers have it at their mercy, promising to tell them the secrets of the Maze Engine or anything else they want. At the first opportunity, it teleports away, summoning demonic aid to cover its retreat if possible.
Activating the Engine
A successful DC 15 Intelligence (Arcana) check is needed to activate the device by puzzling out its array of gears and levers. It then takes 12 rounds for the engine to “align itself” and activate its magical effect. If an initiative order hasn’t already been established by the time the engine activates, have everyone in the party roll initiative.
If the tridrone from “March to Nowhere” accompanies the characters, it can instruct them how to activate the Maze Engine without a check and inform them of how long it takes for the magical effect to occur.
Shaking Loose
The engine, which weighs two tons, is ordinarily set on a solid stone surface. Being wedged partway down a crevasse makes its operation more problematic. When the engine is activated, the vibration of its clacking gears sends showers of loose stones down the crevasse walls.
Once the engine has been activated, it “acts” on initiative count 15.
Mephit Madness
On the round after the Maze Engine activates, two magma mephit fly out of the magma on initiative count 10. Two more magma mephit emerge from the magma each round thereafter on the same initiative count, until a dozen mephits have appeared. The mephits attack anyone on or near the Maze Engine.
Shake, Rattle, and Roll
At the end of its turn during round 3, the engine shifts. Any creature standing on it must make a DC 10 Dexterity saving throw. If the save fails by 5 or more, the creature is knocked off the engine into the magma. Otherwise, a creature failing its save slides down the spherical side of the engine but automatically grabs one of its bands before falling. The creature can use an action to try to climb back onto the engine, doing so with a successful DC 10 Strength (Athletics) check.
At the end of its turn during round 6, the engine shifts again. The effect is the same as described above, except that a creature hanging onto one of the engine’s bands has disadvantage on the saving throw.
If a creature falls from the Maze Engine, another creature adjacent to the falling creature and hanging onto one of the engine’s bands can attempt to use a free hand to grab the falling creature, doing so with a successful DC 10 Dexterity saving throw. A creature saved in this manner can use its action to try to climb back onto the engine, doing so with a successful DC 13 Strength (Athletics) check. If the check fails and the creature’s weight exceeds the carrying capacity of the creature that grabbed it (see “Lifting and Carrying” in chapter 7 of the Player’s Handbook), the creature grabbing it must succeed on a DC 15 Strength check at the start of its next turn or lose its grip on the fallen creature, which then plunges into the magma.
At the end of each of its turns starting on round 9, the Maze Engine slides down the crevasse, dropping 10 feet toward the magma each round. Any creature on the engine must make a successful DC 15 Dexterity saving throw each time it drops down to avoid being thrown off. Resolve the effects as described above. On its turn during round 13, the Maze Engine sinks into the magma and is destroyed.
Shutting Down the Engine
The engine shuts down if any part of it comes into contact with an antimagic field or if it is targeted by a successful dispel magic (DC 19). Otherwise, it can only be shut down by a wish spell or divine intervention.
Maze Engine Effects
The Maze Engine was damaged when the crevasse opened underneath it and swallowed it up. The engine can’t be repaired, and once activated, it does strange and unpredictable things on each of its turns until it is deactivated or destroyed.
On each of the engine’s turns, roll a d100 and consult the Maze Engine Effects table to determine what the engine does.
Maze Engine Effects
| d100 | Effect |
|---|---|
| 01 | The engine emits a flash of golden light. All magic items within 300 feet of the engine are destroyed, except for artifacts, which are cast into the Astral Plane. |
| 02-08 | Arcs of white light play across the surface of the engine until the end of its turn. |
| 09-10 | The engine emits a bright flash of white light. All player characters are transported back in time, as they are now, to the moment when the adventure began. They appear in Velkynvelve’s slave pen, unshackled and unbound, with all of their experience points, abilities, equipment, and memories. |
| 11-15 | The engine makes a loud “WHAAAH” sound until the start of its next turn. For as long as the sound lasts, the engine projects an antimagic field (as the spell) around itself. |
| 16-19 | The hollow interior of the engine flickers with crimson light until the end of its turn, whereupon one dead character or NPC of the DM’s choice is restored to life, as though subjected to a resurrection spell. The revived creature appears in a safe, unoccupied space within 120 feet of the engine. |
| 20-22 | The engine spews slippery goo that splatters across its outer surface. Saving throws to avoid being knocked off the engine and ability checks made to climb the engine have disadvantage until the engine’s next turn. |
| 23-27 | The engine crackles with lightning. All creatures within 30 feet of the engine must make a DC 18 Dexterity saving throw or take 10d6 lightning damage. A target made primarily of metal or wearing metal armor has disadvantage on its saving throw. |
| 28-32 | The engine hums until the end of its turn, at which point a green slaad appears in a safe space within 120 feet of the engine. The slaad rolls initiative and, on its turn, attacks any other creatures it sees. |
| 33-35 | The engine groans loudly and turns each creature within 120 feet of it invisible. A creature’s invisibility lasts until it attacks or casts a spell. |
| 36-39 | Loud whispers emanate from the hollow interior of the engine. Each character in direct contact with the engine can increase one ability score of his or her choice by 2, to a maximum of 24. |
| 40-43 | Multicolored arcs of light play across the surface of the engine, which casts a polymorph spell (save DC 18) on each creature within 20 feet of it. Any creature that fails the saving throw is polymorphed into a flying snake. |
| 44-48 | The engine spits out multicolored gemstones. Any character within 20 feet of the engine can use his or her reaction to catch a 500 gp gem with a free hand. The rest of the gemstones fall into the magma and are destroyed. |
| 49-52 | The engine emits a flash of yellowish-white light. A randomly determined magic item appears in a safe location within 120 feet of the engine. Roll on Magic Item Table G in the Dungeon Master’s Guide to determine what appears. |
| 53-57 | The engine emits a flash of green light. Each creature in direct contact with the engine must succeed on a DC 18 Constitution saving throw or take 10d6+40 force damage. If this damage reduces the target to 0 hit points, it is disintegrated. A disintegrated creature and everything it is wearing and carrying, except artifacts, are reduced to fine dust. |
| 58-60 | The engine flickers with blue light and casts faerie fire, targeting all creatures within 20 feet of it (save DC 18). The spell’s effect has a duration of 1 minute. |
| 61-66 | The engine spews harmless, multicolored sparks until the start of its next turn. |
| 67-70 | The engine emits a flash of violet light. Each creature within 20 feet of the engine must succeed on a DC 18 Constitution saving throw or be petrified until the engine’s next turn. |
| 71-76 | The engine plays calliope music. The next time this result is rolled, the music stops. |
| 77-80 | The engine makes a horrible grinding noise. All lawful creatures within 30 feet of it regain all of their hit points. |
| 81-00 | The engine emits a flash of violet-white light. All extraplanar creatures within 100 miles of the engine instantly return to their native planes of existence. |
Development
If you want to add tension to the end of this encounter, have the Maze Engine trigger a minor eruption after it sinks into the magma, causing the magma to bubble up out of the crevasse, spill into the cavern and nearby tunnels, and force the adventurers and their allies to stay ahead of the magma surge.