Two of the components that Vizeran needs to craft the talisman for his ritual (see chapter 12) can be found relatively close to the archmage’s tower. The Wormwrithings are a honeycomb of tunnels spanning hundreds of miles in the northern reaches of the Underdark, carved from the rock by enormous purple worms. A purple worm nest in the Wormwrithings is an ideal place to find an unhatched purple worm egg. Additionally, Vizeran has heard rumors of a beholder living in the Vast Oblivium, a chasm deep within the Wormwrithings. If the characters didn’t obtain the central eye from Lorthuun or Xazax (the beholders in chapter 9), they can search the Vast Oblivium for the beholder believed to lair there.
The Worm Tunnels
The nearest purple worm nesting area mapped out for the characters by Vizeran DeVir lies forty-eight miles west of the archmage’s tower. The Vast Oblivium lies some twelve miles south of this nursery. Use the guidelines in chapters 2 and 10 as the party travels through the Underdark, but use the Wormwrithings Encounters table instead of the random encounter tables in chapter 2. Foraging is more difficult in the Wormwrithings, requiring successful DC 20 Wisdom (Survival) checks.
Faerzress permeates only the fringes of the Wormwrithings. While the party explores this region of the Underdark, spellcasters won’t have to deal with the effects described under “Faerzress” in chapter 2.
The tunnels created by the purple worms are tubular and roughly 10 feet in diameter. A typical stretch of tunnel is 1d6 miles long before it intersects with another tunnel or a naturally formed cavern.
Wormwrithings Random Encounters
As the characters explore the Wormwrithings, check for a random encounter once per day. Roll a d20 and consult the Wormwrithings Encounters table to determine what, if anything, the characters and their expeditionary force encounter.
When an encounter occurs, roll a d6 to determine how the area is illuminated. A roll of 1 indicates the area is dimly lit by phosphorescent lichen, while a 2-6 indicates the area is dark. The twisting tunnels of the Wormwrithings give creatures the opportunity to surprise the characters (see “Noticing Threats” in chapter 2).
Wormwrithings Encounters
| d20 | Encounter |
|---|---|
| 1-10 | No encounter |
| 11 | 1 drider |
| 12 | Drow hunting party |
| 13 | 3d6 dwarf commoners |
| 14 | 1d6 ettins |
| 15 | 3d6 flumphs |
| 16 | Grick nest |
| 17 | 1 purple worm |
| 18 | 2d6 troglodytes |
| 19 | 1d4 trolls |
| 20 | 1 umber hulk |
Drider
This creature clings to the ceiling and prefers to make ranged attacks against the party. There is a 25 percent chance that the drider can cast spells (use the spellcasting variant in the Monster Manual). The drider flees if reduced to 30 or fewer hit points.
Drow Hunting Party
A drow mage of House Melarn leads a group of 1d6 drow and 2d6 bugbear slaves through the tunnels in search of a purple worm nursery, where they hope to find a purple worm egg as a gift for their matron mother. If the characters have an egg clearly in their possession, the drow party tries to take it. Otherwise, the drow mage is happy to let the characters and their expeditionary force pass by unchallenged.
Dwarf Commoners
There is a 75 percent chance that these shield dwarves are prospectors from Mithral Hall, hunting for precious stones and minerals. Otherwise, they are refugees who became lost in the Underdark after orcs attacked their stronghold and chased them underground. These dwarves are searching for a route to the surface.
Treasure. Each dwarf carries 1d10 pounds of food, 1d4 gallons of water (stored in canteens), and 1d6 gems worth 10 gp each.
Ettins
These ettins used to be orogs until the faerzress and the corrupting influence of Demogorgon transformed them into two-headed giants. Their transformation can’t be undone. They are starving and attack the party on sight.
Flumphs
A cloister of flumphs floats through the tunnels. These peaceful creatures have been disturbed by the powerful thoughts of the demon lords. They warn the characters that these evil thoughts have polluted the Underdark, and that kindness is the only response to such evil.
Grick Nest
The characters stumble upon a naturally formed cyst in a tunnel wall. A grick alpha and 2d4 gricks are using the cyst as a nest, attacking anything that passes by.
Treasure. The walls of the cyst have precious crystals growing out of them. Characters can harvest these crystals, collecting 3d6 intact crystals worth 50 gp each.
Purple Worm
Roll a d6 and consult the Purple Worm Direction table to determine where the purple worm comes from.
Purple Worm Direction
| d6 | Direction |
|---|---|
| 1-2 | The purple worm comes from behind the party, heading in the same direction and filling the entire tunnel. The party must either stay ahead of the worm or turn and fight it. If they stay ahead of the worm, the tunnel branches after 1d6 miles. |
| 3-4 | The purple worm is moving along the tunnel in the opposite direction as the party and appears in front of them. The party must either reverse course or fight the worm. If they reverse course, the tunnel branches after 1d6 miles. |
| 5-6 | The purple worm is burrowing through the solid rock on a path that intersects with the party’s tunnel. The worm erupts from the tunnel wall behind the party, then continues on its way, leaving a new tunnel in its wake. The worm’s passage triggers a rockfall in the party’s tunnel, and each party member must succeed on a DC 13 Dexterity saving throw or take 10 (3d6) bludgeoning damage from falling debris. |
Troglodytes
These troglodytes are heading toward their lair (see “Troglodyte Lair”) and attack any other creatures they come across.
Trolls
These ravenous, insane trolls attack the party on sight.
Umber Hulk
This creature is hidden behind a wall and uses its tremorsense to detect passing prey, bursting out of a nearby wall to attack the nearest party member. Randomly determine who is attacked, taking into account any NPCs traveling with the characters.
Troglodyte Lair
Approximately half way between Araj and the worm nursery, the characters' route is blocked by a looming battle between two factions of a troglodyte tribe.
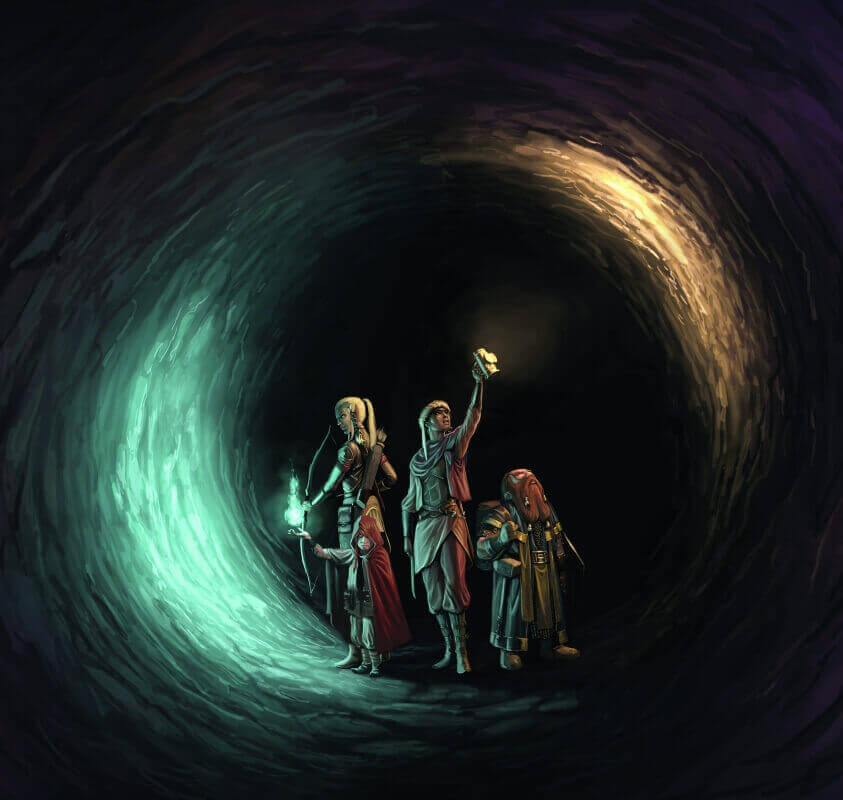
A foul stench and a cacophony of faint, hissing voices rises from ahead. The tunnel plunges sharply downward into a vast, open cavern dimly lit by luminous fungi and bisected by an underground stream. Tall reptilian humanoids stand on either side of the stream, waving makeshift weapons and howling threats at each other in a hissing language.
The group of creatures closest to you has a captive lashed between two stalagmites atop a low rise in the cavern floor. That floor is some twenty feet below you, down a steep but navigable tunnel whose walls are piled high with rubble. The creatures are preoccupied with their conflict and haven’t noticed you yet.
The reptilian humanoids are troglodytes that worship a lesser god called Laogzed-a reptilian horror that dwells in the Abyss. Although Laogzed isn’t a demon lord (and so has not been summoned to the Underdark), troglodytes are being drawn across the Underdark to sites where the demon lords have manifested.
Any character who understands the troglodytes quickly learns what drives the conflict. Otherwise, a successful DC 13 Wisdom (Insight) check can provide a general sense of what’s going on. The troglodytes ambushed and killed a drow scouting party whose leader wielded a magic sword that S’slaar, the troglodyte chieftain, claimed as a trophy. However, S’slaar’s war marshal, H’slaat, was the one who killed the drow leader, and who now claims the right to wield the blade.
The disagreement blossomed into a full-fledged conflict, and the other troglodytes quickly chose sides. On one side of the stream, troglodytes loyal to H’slaat seized S’slaar’s mate and are threatening her, hoping to force the chieftain to back down. On his side of the stream, S’slaar is wildly swinging the magic sword and screaming, as the troglodytes loyal to him shout insults and taunts at the other side.
The characters can turn back without being spotted and find an alternate route bypassing the troglodytes, but doing so adds forty-eight miles (and an increased chance of random encounters) to the distance they must travel before they reach the purple worm nursery. If the characters simply watch the standoff unfold, see “Resolving the Standoff” later in this section.
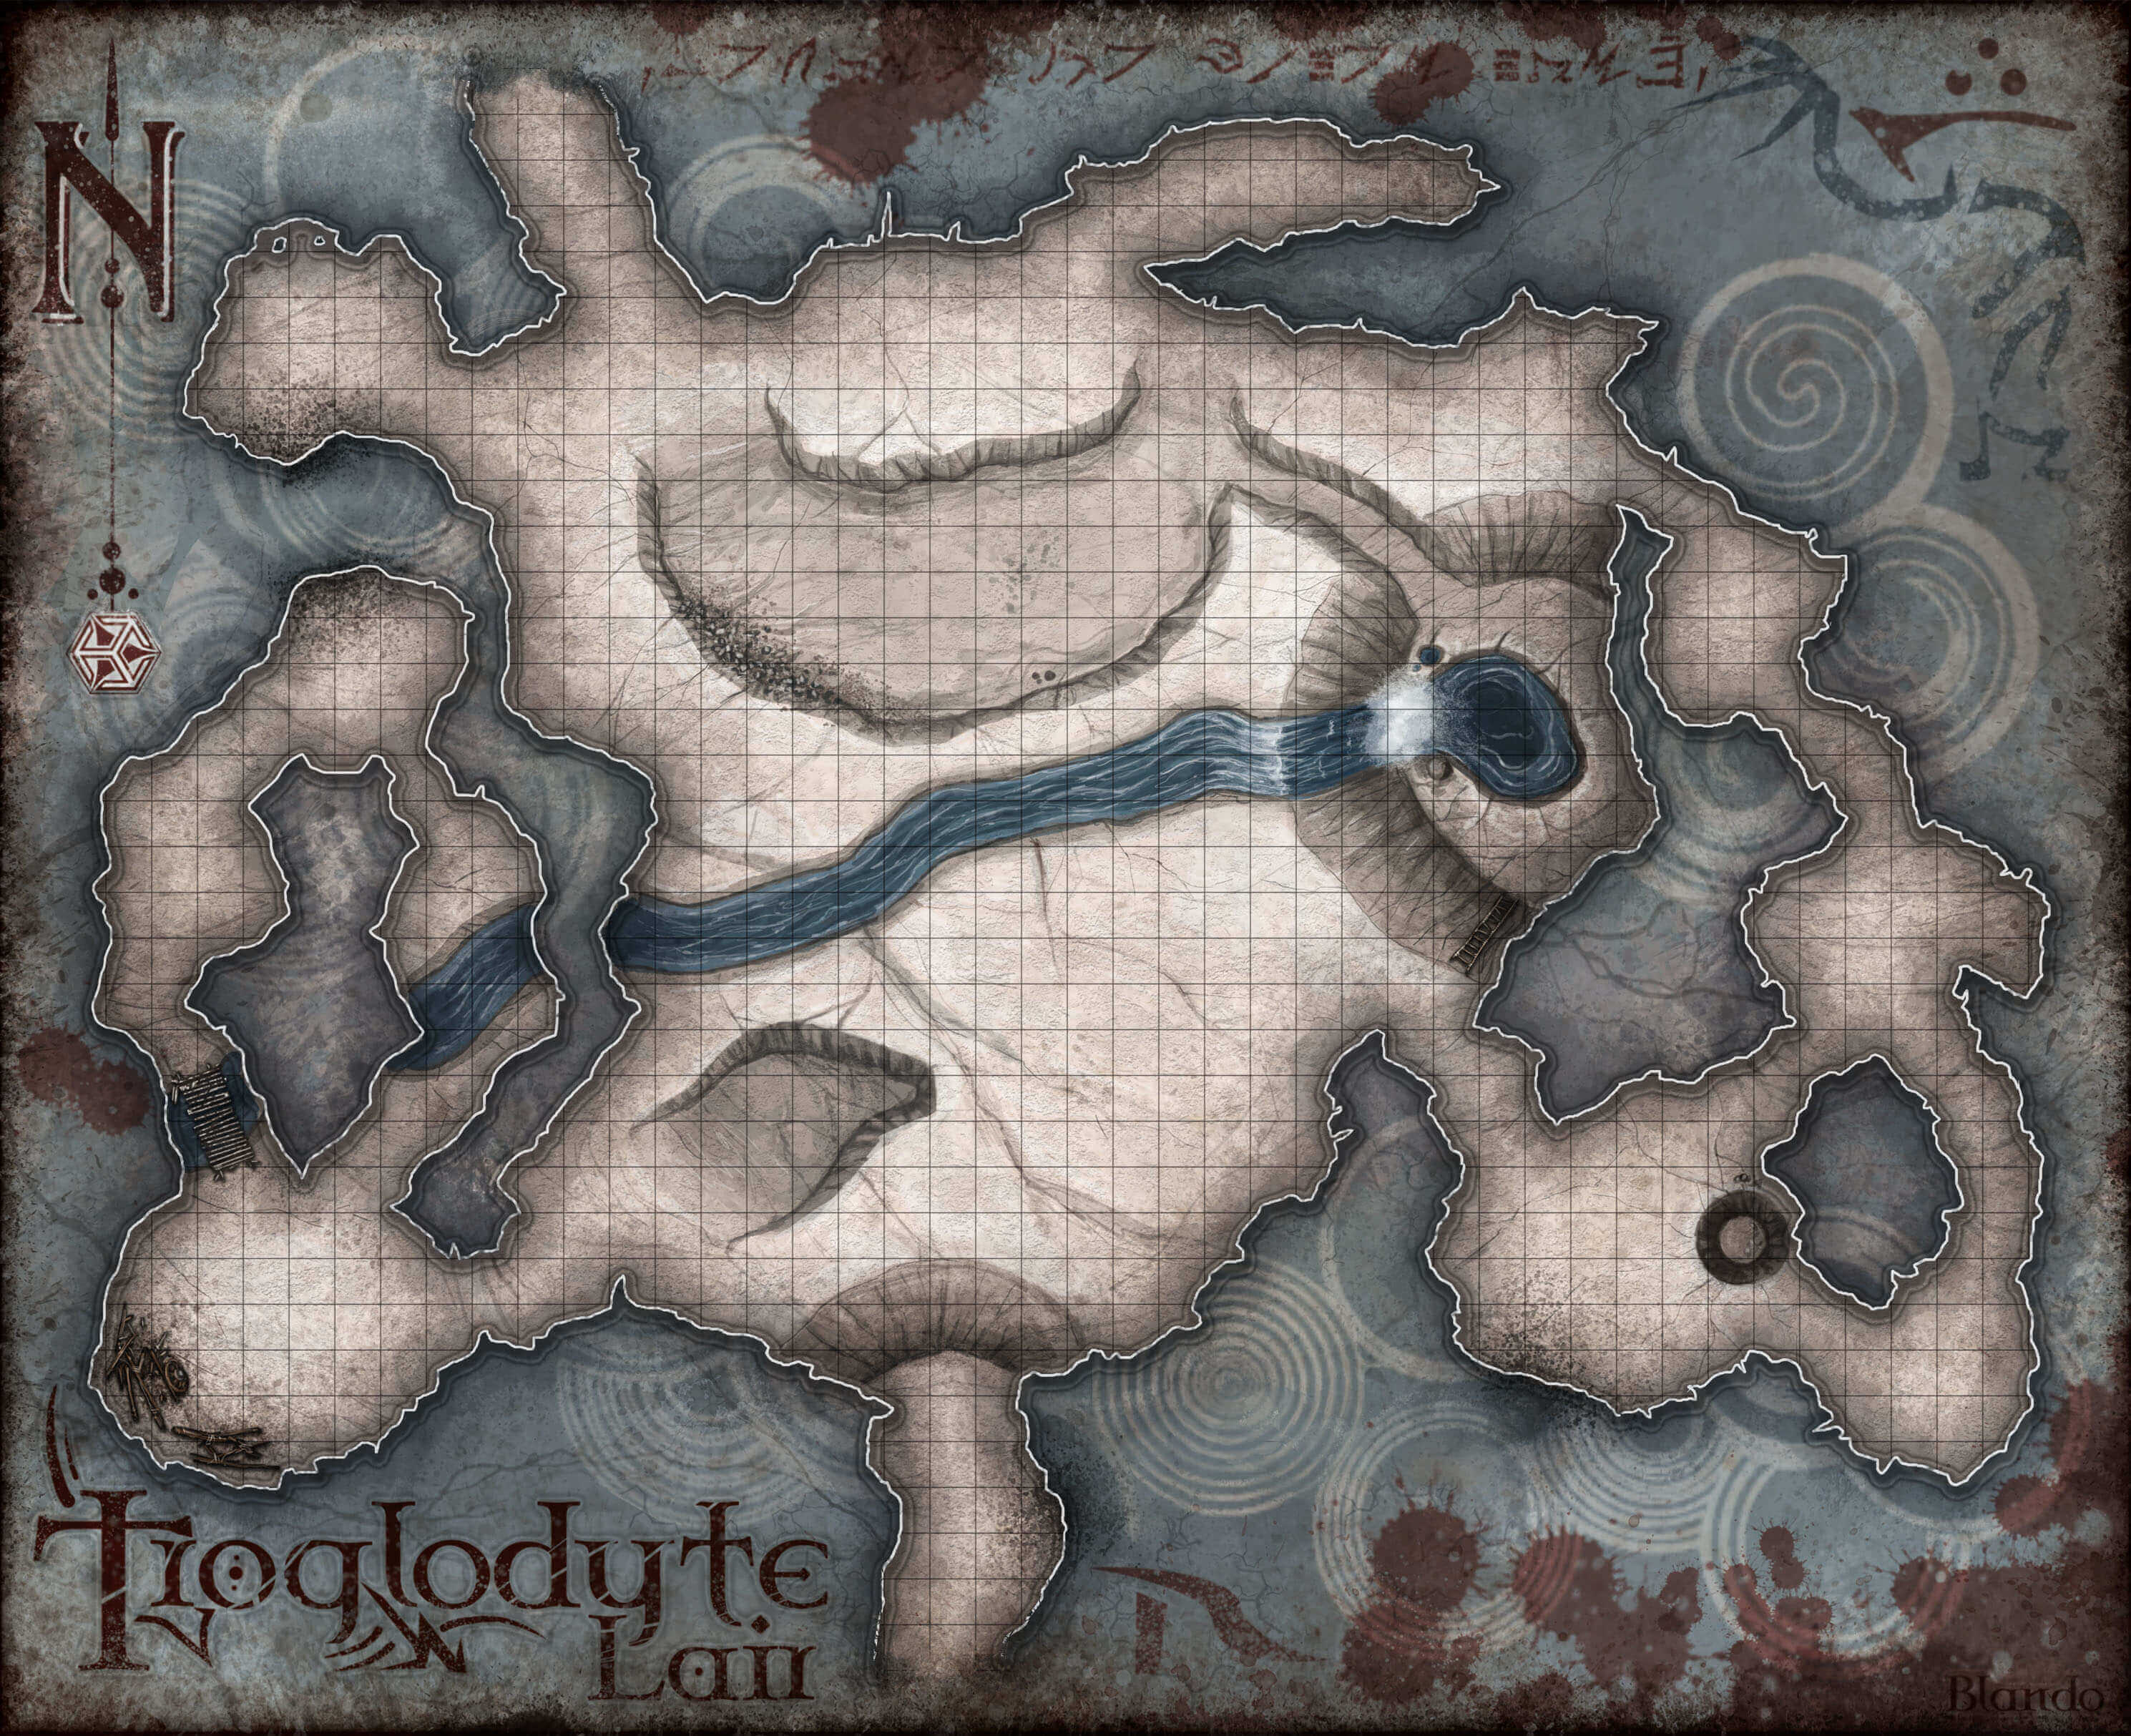
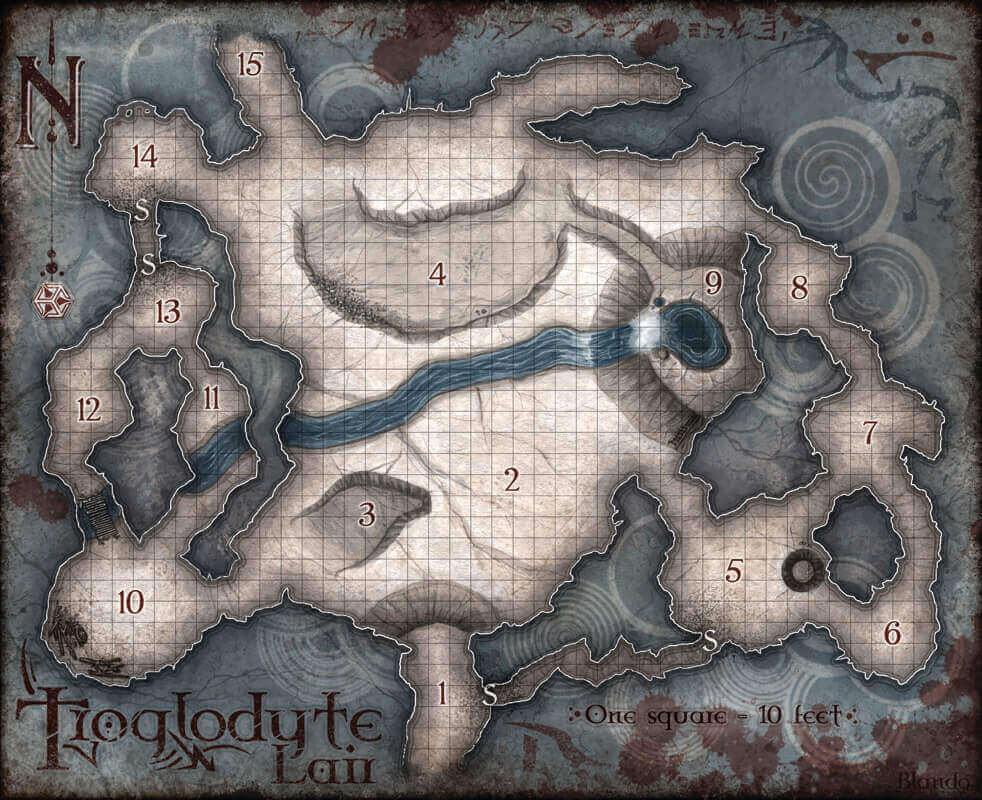
Troglodyte Lair: General Features
Characters notice commonly recurring features as they explore the troglodyte lair.
Light. Nightlights (see “area Fungi of the Underdark” in chapter 2) and other luminous fungi dimly illuminate the caves and tunnels throughout the troglodyte lair.
Ceilings. The main cavern has a 90-foot-high ceiling. Smaller side caverns have 60-foot-high ceilings. Unless noted otherwise, all ceilings have stalactites hanging from them.
Stench. The troglodytes' foul musk can be smelled throughout the lair, although the stench is not strong enough to have any detrimental effect on visitors.
1. Entrance Tunnel
The worm tunnel the adventurers are traveling through opens up atop a steep slope leading 15 feet down into the open cavern. The slope is difficult terrain. As long as the adventurers aren’t calling attention to themselves, they can remain undetected here indefinitely. The troglodytes are too distracted by their standoff to notice them.
Rubble is piled up along the walls on either side of the tunnel. The rubble on the east side of the tunnel conceals a hidden passageway. Any character with a passive Wisdom (Perception) score of 15 or higher notices the hidden passage. Anyone actively searching the rubble finds it with a successful DC 10 Wisdom (Perception) check. Adventurers who head into the passage beyond the rubble discover the hidden entryway to area 5 at the end of the tunnel.
2. Cave Floor
H’slaat, a troglodyte champion of Laogzed, and twenty-two troglodyte are arrayed in a rough battle line along the south bank of a freshwater stream that nearly bisects the cavern. The stream runs west to east, tumbling down a short waterfall and forming a small pool (area 9). The stream is about 15 feet wide and 3 feet deep at its deepest point. It can be crossed on foot but is difficult terrain.
The troglodytes are so distracted that it’s possible to sneak through this area undetected as long as the adventurers stay close to the cavern walls. Each character must succeed on a DC 10 Dexterity (Stealth) check or be noticed by the troglodytes.
Development
Any wounded creature entering the stream attracts the swarm of quippers from area 11.
3. Rise
This upthrust section of the cavern floor is edged by a steep slope to the southwest and a 6-foot-high cliff elsewhere. The cliff requires a successful DC 11 Strength (Athletics) check to climb.
Five troglodyte loyal to H’slaat are stationed here. In addition to their regular attacks, they are armed with javelins that they throw from a pile of twenty-five javelins on the cavern floor near them.
Javelin. Melee or Ranged Weapon Attack: +4 to hit, reach 5 ft. or range 30/120 ft., one target. Hit: 3 (1d6) piercing damage.
H’hoort, a troglodyte and Chieftain S’slaar’s mate, is lashed between two stalagmites here. Another troglodyte stands guard next to her. Releasing H’hoort won’t earn the adventurers a respite from the opportunistic troglodytes, but if the characters hold her captive, both sides are reluctant to attack them.
4. Basin
The area north of the stream is dominated by a 5-footdeep basin. A 10-foot-wide furrow on the east side of the basin slopes down toward area 9.
The troglodyte chieftain has arrayed his forces along the narrow strip of high ground between the basin and the stream. Chieftain S’slaar is a troglodyte with 20 hit points and a +2 longsword. While he wields the sword, S’slaar gains the following action option:
+2 Longsword. Ranged Weapon Attack: +6 to hit, reach 5 ft., one target. Hit: 8 (1d8+4) slashing damage, or 9 (1d10+4) slashing damage if used with two hands.
S’slaar is accompanied by five troglodyte with 20 hit points each and three ordinary troglodyte.
Treasure
S’slaar’s +2 longsword is of drow manufacture (see the “Drowcraft Items” sidebar in appendix B). It has a cross guard shaped like a stylized spider with tiny gems for eyes. Etched into its blade are the words Oloth tlu malla, which is a drow expression meaning “Darkness be praised.”
5. Supplies and Captives
This area is held by H’slaat’s forces. One troglodyte guards the cave. A character can sneak past the guard with a successful DC 12 Dexterity (Stealth) check.
The cave floor is strewn with gnawed bones-the remains of dead dwarves and drow. A circular pit, nine feet deep, holds six captives - two drow and four shield dwarf commoner. These unfortunates were separated from larger groups (see “Random Encounters” earlier in this chapter) and captured by the troglodytes. Every couple of days, one of them is eaten by the tribe. The captives are filthy and weak; each has four levels of
Rubble is piled up along the south wall of the cavern, concealing a hidden passageway to area 1. Anyone with a passive Wisdom (Perception) score of 15 or higher notices the passage. Anyone actively searching the rubble must succeed on a DC 10 Wisdom (Perception) check to find it.
Treasure
Within the cave, four zurkhwood boxes hold a 50-foot length of spider-silk rope, four flasks of oil, twenty pounds of rancid food, a pile of moldy blankets, six maces and sixteen javelins (all battered but usable), four casks of unspoiled wine worth 10 gp each, and a locked tribute chest. It takes a successful DC 15 Dexterity check using thieves' tools to open the chest, which contains 180 gp (minted in Menzoberranzan and Gracklstugh), three gems each worth 50 gp each, a
6. Steam Vent
A thick jet of hot steam spews forth from a crack in the floor near the east wall of this cavern. Growing around the steam vent is a patch of fire lichen (see “area Fungi of the Underdark” in chapter 2).
Anyone with a passive Wisdom (Perception) score of 13 or higher notices a vein of precious gems embedded in the rock wall behind the steam vent. Anyone actively searching the cavern spots the gem deposit automatically. The gems can’t be reached without entering a 10-foot-by-10-foot-by-10-foot cloud of hot steam. Any creature that enters the area or starts its turn there takes 1d8 fire damage. The litters in area 5 or a similar object can be used to block the steam emerging from the vent for 1 round before weakening and falling apart.
Treasure
For each round spent digging at the wall, a character has a 10 percent chance of extracting a gemstone worth 100 gp. The chance increases to 20 percent if the character has a mining background and a miner’s pick. After ten such gems are extracted, the deposit is depleted. For each round that any number of characters dig at the wall, there is a 10 percent cumulative chance that the sound attracts the attention of any troglodytes remaining in areas 5 or 7.
7. Troglodyte Outpost
H’Slaat stationed four troglodyte here to watch for any of S’Slaar’s forces that might try to make their way into attack position through the outer caverns. These guards are always on alert. One of them carries a horn that it sounds in the event of an attack. If the horn is blown, eight of the troglodytes in area 2 come through area 5 and into this cave to investigate and shore up the defenses.
8. Roper Lair
This small cavern is filled with stalactites and stalagmites, making the cave floor difficult terrain. No phosphorescent lichen grows here, so the cave is dark.
Two of the stalagmites are roper, while four of the stalactites are piercer (the ropers' offspring). While lying in wait, the creatures are virtually undetectable. Any party member with a passive Wisdom (Perception) score of 20 or higher notices something unusual about the rock formations in the cave. Unless they are recognized, the ropers and piercers surprise anyone entering the area.
Treasure
Searching the cave reveals the remains of a half-eaten male drow lying against one wall. The drow carries a small pouch containing 30 gp and two spell scrolls (
If the ropers are killed and cut open, the adventurers find 25 pp in the gizzard of one, and a
9. Sunken Pool
Water from the stream pours into this 15-foot-deep grotto, forming a 10-foot-deep pool with a narrow crack in the bottom. The pool’s water is safe to drink, and growing around the pool’s edge are 3d6 waterorbs.
10. Ruins
This large cavern is strewn with zurkhwood beams - enough to make a raft. An old bridge made of moldy zurkhwood planks spans an underground stream in one of the tunnels to the north.
11. Spawning Pool
The underground stream passes through this cave, traveling west to east. The adventurers can hear something splashing in the water as soon as they enter this area. Any character who enters the stream is immediately attacked by the swarm of quippers that has spawned here.
12. Geothermic Vents
The adventurers feel the heat emanating from this area as they approach. Thick cracks, some as wide as 2 feet, crisscross the cavern floor, opening up to a pool of molten rock 25 feet beneath the cavern. The dull orange glow of the lava below bathes this area in dim light.
At the end of every minute the adventurers spend here, roll a d6. On a roll of 1, 1d4 magma mephits emerge from a crack in the floor and attack. No more than twelve mephits appear in a given 24-hour period.
13. Empty Cave
Rocks and small boulders are piled up along the north wall of this otherwise empty cave. The rubble conceals a passageway to area 14, buried during a rockslide. Anyone with a passive Wisdom (Perception) score of 15 or higher notices the hidden passage. Anyone actively searching the rubble must succeed on a DC 10 Wisdom (Perception) check to find it.
14. Rally Point
S’slaar’s cavalry troops are gathered in this cavern, waiting for their master’s order to attack. Six troglodyte are mounted on six giant lizard.
Rocks and small boulders are piled up along the south wall. The rubble conceals a tunnel to area 13. Anyone with a passive Wisdom (Perception) score of 15 or higher notices the hidden passage. Anyone actively searching the rubble must succeed on a DC 10 Wisdom (Perception) check to find it.
Development
When the order comes to attack, S’slaar’s cavalry bursts through the hidden passageway on the south wall of the cave (see “Resolving the Standoff”).
15. Exit Tunnel
This purple worm tunnel leads back into the Wormwrithings. Unless they’re being pursued, the characters can safely leave the troglodytes behind when they reach this area.
Resolving the Standoff
H’slaat orders his followers to commence their attack 20 minutes after the characters arrive at area 1. Unless the characters intervene, the conflict plays out as follows:
- H’slaat orders his fellow troglodytes in area 2 to rush across the stream while the troglodytes in area 3 rain javelins down on the chieftain’s forces. Meanwhile, H’Slaat grabs H’hoort from area 3.
- H’slaat crosses the stream, dragging her behind him. He threatens to kill her unless the chieftain meets him in battle.
- The troglodytes in areas 5 and 7 try to make their way through the side caverns to attack the chieftain’s forces in area 4 from the rear. However, if the ropers and piercers in area 8 have not already been killed by the adventurers, the troglodytes are surprised and massacred.
- S’slaar’s cavalry in area 14 makes its way through the western side caves and attack H’slaat’s forces from behind.
If the adventurers don’t intervene in any way, the battle lasts approximately 20 rounds and ends when H’slaat kills the chieftain in the basin at area 4. Half the troglodytes on both sides are killed in the conflict. Those who remain accept H’slaat as their new chieftain.
While the battle is underway, a character can sneak through an area occupied by troglodytes with a successful DC 10 Dexterity (Stealth) check.
As tense as the standoff between H’slaat and S’slaar might be, the troglodytes quickly forget their conflict and unite against common threats, such as the characters and their unwelcome expeditionary force.
Voice in the Dark
After dealing with or avoiding the troglodytes, the adventurers can continue on toward the purple worm nursery. However, within six miles of the nursery they come across an unexpected presence in the darkness.
The remnants of a rockfall have opened up a small vaulted cavern along the passageway. Apart from the occasional glowing insect scuttling along the walls, the cavern is dark.
Suddenly, a loud voice booms out all around you in Undercommon: “Turn back or suffer a death so horrible you cannot imagine! You have been warned!”
The voice is actually a minor illusion cantrip. If no one in the party understands Undercommon, the dire warning is just loud gibberish to them. The cantrip was cast by Hanne Hallen, a young drow allied with House Mizzrym. Hanne has the statistics of a drow, with the following modifications:
- Hanne’s AC is 12, or 15 with mage armor. She doesn’t wear a chain shirt.
- Her Intelligence is 17 (+3).
- Add Arcana +5 and Investigation +5 to her skills.
- Add Common to her list of known languages.
Hanne also has the following Spellcasting feature:
Spellcasting. Hanne is a 1st-level spellcaster. Her spellcasting ability is Intelligence (spell save DC 13, +5 to hit with spell attacks). She has the following wizard spells prepared:
Cantrips (at will): minor illusion, ray of frost
1st Level (2 slots): shield, mage armor
Hanne’s mother, Zhora Hallen, leads the Dark Hunters-drow explorers who steal purple worm eggs. These eggs are prized by wizards, who use them in various arcane rituals. Hanne was on her first egg run with her mother’s team when a passing purple worm burst into the tunnel they were traveling through, separating her from the rest of the group. Convinced that her mother and the rest of the Dark Hunters were killed by the purple worm, the headstrong and halfstarved young mage-in-training is attempting to make her way back to Menzoberranzan.
Hanne spotted the adventurers as they approached and tried to scare them away. She’s hiding in the rubble along the cavern wall but can be spotted with a successful DC 15 Wisdom (Perception) check.
If the adventurers decide to turn back, finding another tunnel going in the right direction adds twenty miles to their journey to the worm nursery. If they press ahead, the voice shouts in Undercommon again: “Fools! Flee now! This is your final warning!” Once the adventurers enter the cavern, Hanne can be spotted with a DC 10 Wisdom (Perception) check. If spotted, Hanne threatens the party with her “powerful magic,” but drops her hostile attitude if offered food and water. She can be convinced to tell her story with a successful DC 12 Charisma (Persuasion) check.
If the characters attack Hanne, she fights to the best of her ability. If the adventurers are friendly toward her, Hanne is willing to travel with them for safety.
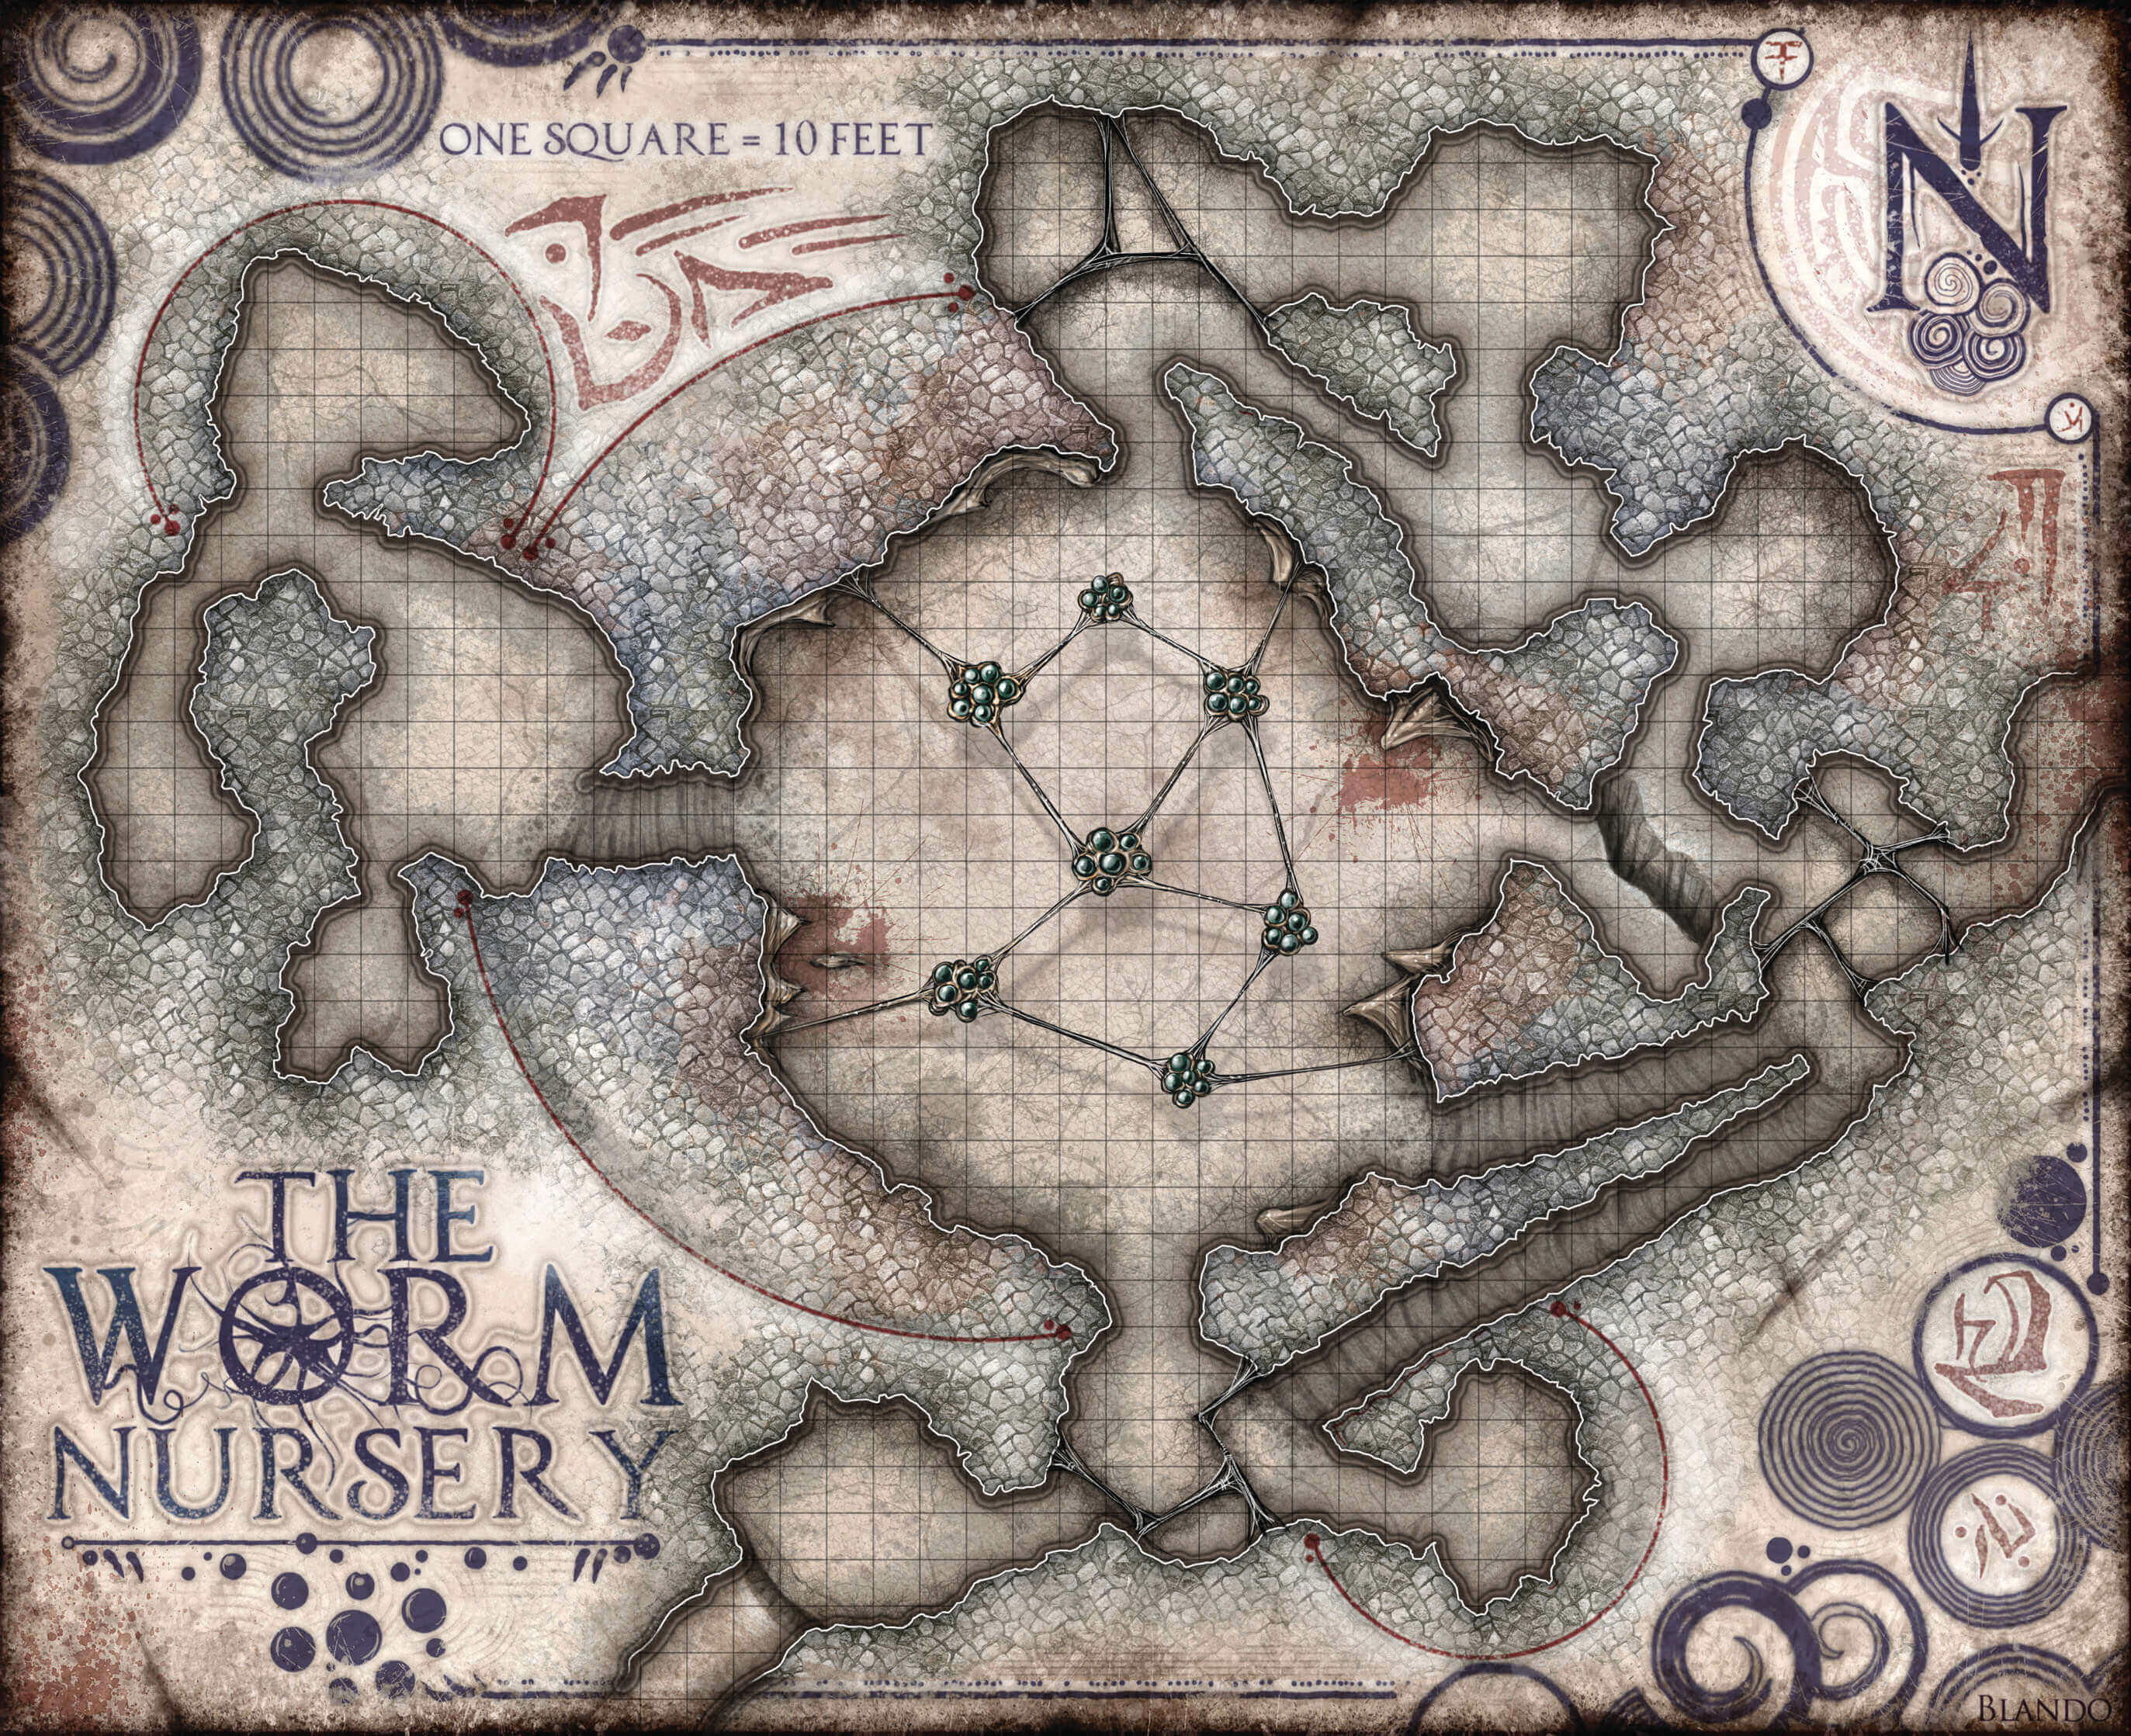
Worm Nursery
As the characters near the nursery, they get a view of one of its guardians-and might take an unexpected fall.
As you make your way through a long tunnel, everything around you begins to shake and rumble. Suddenly, the tunnel floor gives way at your feet.
The tunnel through which the characters travel is directly above area 1 of the nursery. The burrowing of a nearby purple worm weakens the tunnel floor, causing a 10-foot section of it to break apart and collapse. Any character in the area must make a successful DC 15 Dexterity saving throw or fall 25 feet into area 1 below.
Hanne’s Help
Educated by her mother, Hanne Hallen (see “Voice in the Dark”) knows quite a bit about purple worms. If she’s traveling with the characters, she realizes that they are in a worm nursery as soon as she enters area 8. She also recognizes the echo chambers (area 5) and understands their function.
Hanne won’t want to leave the nursery without an egg of her own. If necessary, she’ll sneak away from the rest of the party to try to obtain one.
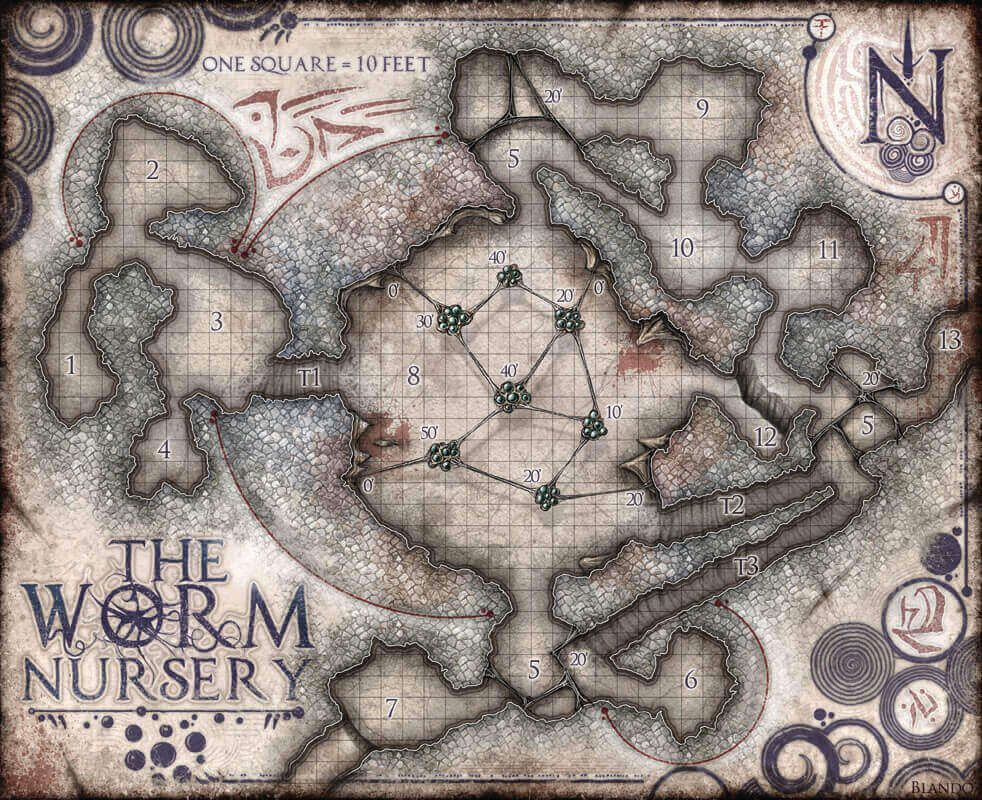
Worm Nursery: General Features
The characters encounter the following features in the purple worm nursery.
Light. All tunnels and chambers are dark unless the text states otherwise.
Purple Worm Tunnels. The tunnels marked T1, T2, and T3 on the map do not exist when the characters first enter the nursery. They are created by purple worms after the party arrives, as noted here:
- Fifteen minutes after the party enters area 1, a purple worm digs into area 1, then travels through area 3 and creates tunnel T1 to enter area 8.
- Ten minutes after the first worm arrives, a second purple worm enters through the tunnel in area 7. It makes its way through the adjoining echo chamber, then into area 8. Then it digs tunnel T2 into the eastern echo chamber before exiting through the worm tunnel in area 14.
- Fifteen minutes after the second worm arrives, another purple worm enters through the tunnel in area 7, digs tunnel T3 from the southern echo chamber into the eastern echo chamber, then exits through the worm tunnel in area 13.
Visiting worms are heralded by a low rumbling sound 2 minutes before they appear. (The bats in area 9 also swarm and flee their roost 1 minute before a purple worm appears.) Purple worms ignore intruders except those in areas 5 or 8, but they won’t pursue anyone fleeing from those areas.
1. Entry Cavern
Any characters dropped into this dark cave have time to recover, while characters who avoided falling can anchor ropes to the edge of the tunnel floor above, then climb down into the cave. In any event, the characters hear more rumbling off in the distance.
2. Fungus Cave
A variety of fungi blankets this dark, 15-foot-high cavern. Every 10 minutes spent foraging here yields 1d3 pounds of edible fungi per forager (to a maximum of 30 pounds).
The passage to area 3 is a steep slope leading 10 feet upward, and covered in small rocks and gravel. Moving up the slope requires a successful DC 12 Dexterity (Acrobatics) check. On a failed check, a character slips and tumbles down to the bottom of the slope, taking no damage. If someone at the top of the slope lowers a rope to help other characters climb, no check is necessary.
3. Ossuary
This 30-foot-high chamber is dimly lit by luminescent lichen. Thousands of bones carpet the cavern floor, including many recognizable as humanoid (primarily dwarf, elf, and goblin) and some belonging to strange and unidentifiable creatures. Exactly where the bones came from is a mystery. A crack in the south wall leads to area 4.
The tunnel marked T1 on the map doesn’t exist until a purple worm creates it fifteen minutes after the party discovers area 1 (see the “Worm Nursery: General Features” sidebar). Thus, the characters won’t be able to reach area 8 until the tunnel is formed.
4. Chasm
This 30-foot-high unlit cavern has a twenty-foot-wide pit in its center, which descends a thousand feet. Thirty feet down is a small ledge holding the skeletal remains of a moon elf adventurer clad in moldering leather armor.
Scaling the chasm walls without gear requires a successful DC 15 Strength (Athletics) check.
Treasure
The skeleton still wears a
5. Echo Chambers
These three 60-foot-high caverns, hollowed out and expanded by purple worms, are set around area 8 as a defensive measure. Using their saliva, the worms have created thick, resinous strands that stretch from wall to wall. These strands are 2 feet thick and suspended some 50 feet above the floor.
Any noise in one of these chambers (including a normal speaking voice or metal striking metal) causes the strands to reverberate, creating a loud humming that echoes throughout the surrounding caverns, alerting the purple worms to the presence of trespassers.
Development
If the adventurers set off a humming in one of these echo chambers, a distant rumbling can be heard and felt as a purple worm burrows toward the egg chamber, arriving there in 1d4 minutes (see area 8 for details).
6. Caretaker’s Quarters
Phosphorescent lichen clings to the walls of this 30-foothigh cavern. Stronk, a brutish fomorian, lairs here. Somehow the giant formed a bond with the purple worms, becoming a caretaker of their eggs. He regularly checks the eggs, brushes fungus off them, and defends them against predators.
Stronk is sleeping on a pile of skins and loudly snoring when the adventurers arrive. Characters looking around the room can see the remnants of the fomorian’s grim meals-travelers lost in the Wormwrithings or egg-hunting adventurers.
Venturing into Stronk’s lair without waking him requires a successful DC 12 Dexterity (Stealth) check. If awakened, the fomorian shouts out about “killing egg thieves” and “protecting my precious ones,” then fights to defend the nesting area and protect the eggs. If Stronk is reduced to half his hit points or fewer, he charges into the adjoining echo chamber (area 5) and bellows to summon a purple worm before rejoining the battle.
Treasure
All the treasure Stronk has taken from his victims has been placed under his sleeping skins for safekeeping: 40 pp, an electrum brooch worth 120 gp, six gems worth 50 gp each, two
7. Entry Chamber
This cavern rises to a height of 50 feet and contains many stalagmites and stalactites. A purple worm tunnel leads out into the Wormwrithings through this area, but the tunnel’s mouth is 40 feet above the cavern floor. Scaling the rock wall to reach the tunnel requires a successful DC 15 Strength (Athletics) check.
Development
Zhora Hallen and her Dark Hunters enter the purple worm nursery by scaling down the rock wall here shortly after the adventurers arrive (see “Dark Hunters”). Characters can also leave the nursery and return to the Wormwrithings via this route.
8. Egg Chamber
The ceiling of this cavern is 80 feet high. A pair of purple worms have laid their eggs here, cementing them together and anchoring them to the cavern walls with their resinous saliva. Seven clusters hold six eggs each, as noted on the map. Each egg is a silvery sphere 3 feet in diameter. Its shell is tough (AC 20), but an egg is destroyed if it takes any amount of damage.
three of the four resin strands anchoring the network of egg clusters to the cavern walls feature stray threads that drop all the way down to the cave floor. It’s possible to climb up to the strands at these points to reach the eggs. Traversing the strands is slow going; each 1 foot of distance costs 3 feet of movement. Anyone fighting or taking strenuous action atop a strand must succeed on a DC 10 Dexterity (Acrobatics) check to avoid falling off. An adventurer who reaches an egg cluster and has a suitable cutting tool (such as a dagger, sword, or axe) can carefully hack an egg out in 2d4 minutes.
The upper reaches of the egg chamber are covered in webs spun by the giant spiders in area 11. Some of these webs reach all the way down to the egg clusters.
For every five minutes the adventurers spend in this room, check for a random encounter by rolling a d20 and consulting the Egg Chamber Encounters table.
Egg Chamber Encounters
| d20 | Encounter |
|---|---|
| 1-15 | No encounter |
| 16-18 | 1 giant spider from area 11 |
| 19-20 | 1 purple worm |
The giant spider walks on the ceiling and surprises the adventurers unless someone in the party has a passive Wisdom (Perception) score of 14 or higher.
If a purple worm appears, it enters the nursery through the tunnel in area 7 and circles the outside of the cavern. Any party member in the egg chamber can try to hide with a successful DC 10 Dexterity (Stealth) check. A failed check means the party member attracts the worm’s attention.
The purple worm attacks anyone it detects in the chamber except the giant spiders from area 11 and the fomorian from area 6. It won’t pursue fleeing characters anywhere except into the adjoining echo chambers (area 5) or the slop cave (area 10). If it doesn’t detect any intruders, the purple worm exits the complex through the tunnel in area 7, passing through the nearest echo chamber along the way.
9. Bat Cave
This cave is thick with stalactites and stalagmites, and home to thousands of bats. The cavern floor is covered in a thick layer of guano, making the floor difficult terrain. The bats spend most of their time clinging to the cavern’s 60-foot-high ceiling, but the noise of the purple worms drives them into a shrieking, flapping frenzy.
Whenever a purple worm enters the area 8 (whether as a random encounter or in response to an alarm from area 5, or as noted in “Worm Nursery: General Features”), a swarm of bats flies out of the cave 1 minute before the worm appears. Roll a d6 to determine which way the bats go. On a roll of 1-3, the bats take the shortest route to the tunnel in area 7 and exit through that tunnel. On a roll of 4-6, the bats take the shortest route to the tunnel in area 14 and exit through that tunnel.
The swarm doesn’t attack unless threatened, but any creature that occupies an area the swarm passes through is buffeted by scores of bats, taking 1d4 bludgeoning damage.
Development
When the purple worm that caused the bats to swarm exits the nursery, the bats return to this cave to roost 10 minutes later.
10. Slop Cave
The floor of this dark, 60-foot-high cavern is covered in a thick layer of viscous purple worm saliva. Consequently, the floor is difficult terrain. As they enter, adventurers notice dozens of glinting objects in the goo beneath their feet. Further inspection reveals the sparkling objects are precious gems.
For every minute the adventurers spend in this cave, there is a 25 percent chance they attract the attention of 1d4 giant spiders from area 11. The spiders scuttle along the walls and ceiling, avoiding the gooey floor.
Treasure
If the adventurers take 10 minutes to search through the goo, they can retrieve a total of twenty 50 gp gems.
11. Spider Nest
Giant spiders enjoy a symbiotic relationship with purple worms and are frequently found lairing in purple worm nurseries. The multitude of predators that seek out the worms' eggs provide the spiders with easy prey, while the presence of the spiders provides additional protection for the hatchery.
The eastern half of this cavern floor is covered in webs stretching up to the ceiling. See “Dungeon Hazards” in chapter 5 of the Dungeon Master’s Guide for rules about webs. Eight giant spider lurk in the nest, minus any killed elsewhere in the nursery.
12. Chasm
A chasm cuts across this cavern, stretching from wall to wall. The chasm is 10 feet wide, 200 feet deep, and slopes down to the southwest at a sixty degree angle. The chasm’s slope can be climbed with a successful DC 15 Strength (Athletics) check. A creature that fails the check by 5 or more goes tumbling down the slop to the bottom of the chasm, taking damage from the fall as normal.
Treasure
At the bottom of the chasm lie the skeletons of two svirfneblin who tried to leap across the chasm while being chased by a purple worm. Lying near the remains are two miner’s picks and a small leather pouch containing a
13. Exit Tunnel
Characters can exit the worm nursery and return to the Wormwrithings via this purple worm tunnel.
The Dark Hunters
The Dark Hunters consist of Zhora Hallen (a drow elite warrior) and ten drow. Each carries adventuring equipment (bedroll, rope, a flask of oil), three days' worth of food and water rations, and 2d6 × 10 gp. Zhora and her comrades survived the purple worm attack that separated them from Hanne (see “Voice in the Dark”). Zhora believes that Hanne is dead.
Twenty minutes after the characters first enter the purple worm nursery through area 1, Zhora and her Dark Hunters enter these caverns through the tunnel in area 7, then scale down to the cavern floor. They spend a few minutes regrouping and making their way through the southern echo chamber, then arrive in area 8 and scale the resin strands to grab two purple worm eggs. If they encounter the adventurers and Hanne isn’t present, the drow are hostile, though they might be convinced to enter a temporary truce with a successful DC 20 Charisma (Persuasion) check.
If Hanne is with the party and has been well treated, she and her mother have a quiet reunion. Zhora gravely promises the adventurers that she will repay the debt she owes them however she can.
Development
If the characters reunite Zhora and Hanne, this act of benevolence could lead to Zhora potentially aiding the adventurers in chapter 15, “The City of Spiders.” See that chapter for details.
The Vast Oblivium
Following Vizeran’s directions, the characters find the chasm known as the Vast Oblivium - the lair of the beholder Karazikar - twelve miles from the purple worm nursery.
The beholder created the Vast Oblivium using its disintegration eye ray. This lair consists of a central chasm known as “Karazikar’s Maw,” surrounded by ten vertical shafts. These are interconnected with horizontal tunnels resembling “spokes” and honeycombed with small caves used by the beholder’s followers and slaves. A web of rope bridges crisscrosses the maw, connecting passages on different levels.
Lost Friends
The liberation of the Vast Oblivium makes a useful bit of backstory for introducing or reintroducing a character into the party. If an adventurer or NPC was lost in the Underdark, or if you want an NPC left behind at a settlement to put in a reappearance, have that character appear as a slave taken by Karazikar. Depending on the circumstances, the character might even join up with the adventurers during the final battle to defeat the beholder. Similarly, a new player character joining the party might start out as a prisoner of the beholder, now freed.
The Vast Oblivium: General Features
The characters encounter the following features in the alien landscape of the Vast Oblivium.
Light. The tunnels and chambers of the Vast Oblivium are dimly lit by glowing fungi and lichen.
Bridges. The central chasm of Karazikar’s Maw is 100 feet across, spanned by bridges made of gut and zurkhwood that are anchored to metal rings in the rock walls of the tunnel entrances. The tunnels are staggered so that the bridges cross over each other at different points. From any bridge, a character can climb or drop 10 feet to reach a bridge leading to a tunnel on an adjacent level.
Chasm. The chasm of Karazikar’s Maw extends some five hundred feet below the lowest bridged tunnels, plunging into darkness. A fall into the chasm deals 20d6 bludgeoning damage.
Shafts. The ten vertical shafts around the perimeter of the chasm are each 30 feet wide and 100 feet from top to bottom. They’re located 100 feet from the edge of the chasm and connected to it by tunnels. Each shaft features side chambers and small caverns, and has rope ladders for Karazikar’s slaves to move up and down them.
Inhabitants
Karazikar considers itself the master of all it surveys. The beholder doesn’t live alone, though, keeping its lair well stocked with disposable servants.
Karazikar the Eye Tyrant

Like most of its kind, this beholder is hateful and paranoid, trusting no one. Its servants are keenly aware that failure to please their master means death or petrification.
Karazikar has goals beyond simply ruling over its domain. Long ago, the beholder heard rumors of an arcane device known as the Maze Engine, capable of shifting the gears of reality. During the last Great Modron March, Karazikar captured a pentadrone and afterward became convinced the Maze Engine existed in the Underdark. Unfortunately, the modron’s axiomatic mind couldn’t be broken, and it perished rather than reveal anything. Since then, the beholder has made it known that it’s interested in certain “curiosities,” and it rewards anyone who brings it more modrons or hints about the existence or location of the Maze Engine (which is described in chapter 14).
Shedrak of the Eyes
The beholder’s favorite slave is a human named Shedrak of the Eyes. As Karazikar’s “high priest,” he leads other slaves in worship of their master and carries out the beholder’s commands.
Formerly an adventurer from the surface world, Shedrak and his companions delved too deeply into the Wormwrithings. His companions became Karazikar’s playthings for a time, but Shedrak alone was able to resist and withstand all ten of the beholder’s eye rays. Impressed by this feat of extraordinary luck, Karazikar made the human his acolyte after breaking his mind and his will. Shedrak is completely mad, considers Karazikar a god, and brooks no defiance or disrespect toward his “divine master.”
Slaves
One hundred slaves of various humanoid races serve the beholder. Some were captured while wandering too far from their Underdark settlements, while others were purchased in the slave bazaars of Menzoberranzan. The youngest slaves were born in the Vast Oblivium and raised here, knowing no other life. Many of the beholder’s slaves worship it, particularly those born here, their minds warped by the aberration’s charm rays and their lifelong captivity.
All of the slaves fear Karazikar, and the notion of acting against the beholder seems impossible to them. However, witnessing the bravery of the adventurers has a chance to sway them. If the characters demonstrate their willingness to challenge the beholder (including by killing Shedrak), surviving slaves can be convinced to aid them with a successful DC 16 Charisma (Persuasion) check. On a failed check, slaves either attack the characters or hide from them, waiting for Karazikar to deal with them.
Arrival
When the characters come within a mile of the Vast Oblivium, they feel a growing sense of being watched. They catch glimpses of eyes peering out of the shadows. These eyes close and vanish when anyone tries to focus on them, and adventurers who search for signs of what caused them must succeed on a DC 11 Wisdom saving throw or gain one level of madness (see “Madness” in chapter 2).
The characters' tunnel ends at the top of one of the exterior shafts of the Vast Oblivium (see “The Vast Oblivium: General Features”). Characters can use the rope ladders to reach the bottom of the shaft, and from there make their way to the chasm known as Karazikar’s Maw.
Welcome to Karazikar’s Maw
Shedrak meets visitors at the chasm, greeting them in the name of his master, the great Karazikar, and asking their business. Use the mage statistics to represent Shedrak, with the following modifications:
- Shedrak is chaotic evil.
- He has ten small eyes tattooed on his bald head that allow him to see invisible creatures and objects as if they were visible.
- He carries a nonmagical staff topped with a varnished beholder eye. Karazikar can see through this eye and treats it as one of its own eyes for the purpose of using its eye rays. Breaking the staff renders the eye inert and prevents Karazikar from using this property.
- He carries a potion of healing, a potion of poison, and a spell scroll of globe of invulnerability.
As long as the adventurers are respectful toward Shedrak and his master - and particularly if they claim to carry messages or items of possible interest to the beholder - Shedrak agrees to lead them to Karazikar.
If the characters become hostile, Shedrak orders them to depart, lest they provoke the wrath of his all-powerful master. If attacked, he uses his
Shedrak allows up to ten party members accompany him, demanding that the rest of the expeditionary force remain behind. Shedrak then leads the smaller group across a bridge into the middle of Karazikar’s Maw.
Audience With Karazikar
Whether they’re escorted by Shedrak or make their own way into Karazikar’s Maw, the adventurers first encounter the beholder as they cross the chasm. The beholder descends from the shadowy ceiling, staying at least 20 feet away from the bridge.
If the characters have come to talk, Karazikar hears them out. The beholder is supremely arrogant, and it speaks and understands only Deep Speech and Undercommon. If any of the characters bluff about having information of interest to the beholder, Karazikar mentions the Maze Engine, either to see if the adventurers know of it, or in a scoffing tone to suggest they can’t possibly know anything that it has not already learned.
Killing Karazikar is the only way to claim the beholder’s central eye for Vizeran. At the first hint of violence, the beholder uses its disintegration ray to disintegrate a 10-foot section of the bridge, hoping to plunge one of more party members into the chasm. It then targets enemies with its other eye rays and makes full use of its lair actions (see the Monster Manual). Against characters who attempt to hide from it, the beholder uses a lair action to cause an eye to open up on a wall with line of effect to a hiding creature, then attacks with one of its eye rays.
Karazikar’s slaves fearfully scatter during any confrontation, but if Shedrak is alive, he protects his “god” as best he can. If the beholder is reduced to 45 or fewer hit points, it attempts to flee, ordering Shedrak (if he’s still alive) to cover its retreat.
When the beholder is reduced to 0 hit points, its corpse slowly sinks, falling 10 feet at the start of every turn until it reaches the bottom of the chasm. A character within reach of the beholder can use an action to gouge out its central eye. There is also a 10 percent chance at the end of each turn that the beholder’s corpse lands on a bridge.
Freed Slaves
If Karazikar and Shedrak are defeated, the beholder’s slaves emerge from various tunnels, file out onto the bridges, and kneel in supplication, worshiping their liberators as gods. Each slave bears the brand of Karazikar on its forehead-a scar shaped like an open eye. The slaves are unarmed and include the following:
- 21 shield dwarf commoner
- 17 human commoner
- 11 moon elf commoner
- 8 female drow and 1 male drow
- 5 deep gnomes
- 23 goblin
- 15 orog
All of the slaves have four levels of
The slaves know several intriguing bits of information:
- Karazikar hid its treasure in the uppermost reaches of the chasm. The only way to reach the treasury is by levitation or flight.
- The beholder was preoccupied with finding an arcane contraption called the Maze Engine.
- The beholder recently captured a strange mechanical creature that might know where the Maze Engine is located (see “Modron Prisoner” below). The creature is locked in a room sealed with a rolling stone door. The beholder used its telekinesis eye ray to open and close the door.
Any slaves that don’t join the party are anxious to make their way to the nearest peaceful Underdark settlement. The drow are eager to return to Menzoberranzan, the deep gnomes to Blingdenstone. If the characters urge the slaves to leave the Vast Oblivium and make their own way home, they are all killed while trying to escape from the Wormwrithings. If the characters assign members of their expeditionary force to lead the slaves out of the Wormwrithings, the slaves stand a much better chance of making it to safety.
Modron Prisoner
One or more slaves can lead characters to a small room on the uppermost level of the complex. The room is sealed off with a 6-inch-thick circular stone door that can be rolled aside with a DC 20 Strength check or opened with a knock spell or similar magic. The room holds a damaged duodrone that Karazikar recently captured in the hopes of unlocking more information about the Maze Engine.
The duodrone has 1 hit point remaining and speaks its own language of clicks and whirs, always referring to itself as “we” or “us.” The demonic madness as scrambled its memory, but if a greater restoration spell is cast on it, the modron remembers two things:
- “We were part of a great march. We were separated. Then we were lost. Then we were captured. Then we started freaking out. Then you found us.”
- “We know nothing about a ‘Maze Engine.’ However, we can detect an Orderer approximately 289 miles south of our present location.” (The “Orderer,” claims the modron, is a device that brings order to chaos. It is, in fact, what others refer to as the Maze Engine.)
Treasure
The beholder used its disintegration eye ray to carve a rough likeness of itself in the ceiling of Karazikar’s Maw-a great stone beholder face glaring down upon the gaping chasm, its central eye a hollow shaft that leads up to a hemispherical vault where the beholder hides its considerable hoard: 15,000 gp, 1,300 pp, ten assorted gems worth 500 gp each, a